Showing posts with label Reclaimed. Show all posts

Monday, February 3, 2014

Faux Pewter Chocolate Molds

This makeover of mine was featured in the Spring 2012 issue of A Primitive Place Magazine!

Sometimes the package is better than the gift, as was the case with these discarded clear plastic treat containers shaped like chocolate bunnies. These looked so much like antique chocolate molds, I decided to hang on to them and go with the faux. Faux Pewter, that is.
Using inexpensive flat black spray paint, I covered the exterior of these clear plastic candy holders. When dry, I added two coats of Dark Patina by DecoArt Dazzling Metallics (available at Michael’s Arts and Crafts) and allowed drying time. To add a darker patina look, I brushed on some Old English Scratch Cover, wiped the excess with a rag, and sealed with a liberal coat of clear acrylic gloss sealer spray. This same process also works great on discarded plastic egg containers, resulting in a new and improved way to recycle plastics and make holiday decorations on the cheap.
redshedvintage.com© copyright 2014



Thursday, September 12, 2013

Trash Talk Thursday: Spice Box from a Nut House

 
Spice boxes and apothecary cabinets conjure up warm thoughts of colonial hearth cooking. Once used as compartmentalized storage of herbs & spices or apothecary needs and often made of wood or tin with many drawers, these storage units served a valuable purpose and are still very popular today.
They can also be very expensive.
To make-do without making wallet empty, look no further than the garage nut house for a wonderful alternative spice box/apothecary cabinet!
~ Check it out! This makeover of mine was featured in the Winter 2011 issue of A Primitive Place Magazine, page 104 ~
After making sure that the sturdy little house of many drawers won’t be sorely missed, empty & clean the plastic or metal bin drawers in a dishpan of soapy warm water & dry completely, then wipe the cabinet unit with a damp rag. When dry, apply a liberal coat of flat spray paint on the drawer fronts & cabinet. Paint desired color, using interior flat or matte, then when dry rub on stain & sealer to desired antique finish. If extra durability is desired, follow with a protective coat of clear acrylic spray.
Spice names can easily be painted or stamped using acrylic arts and crafts paint. I purchased a tiny set of alphabet letters for $1.00 at Michaels recently, and dipped the ends in black paint to stamp on the finished drawers. © copyright 2011 redshedvintage.com


Thursday, September 5, 2013

Trash Talk Thursday: A Curiously Cheap Spice Box


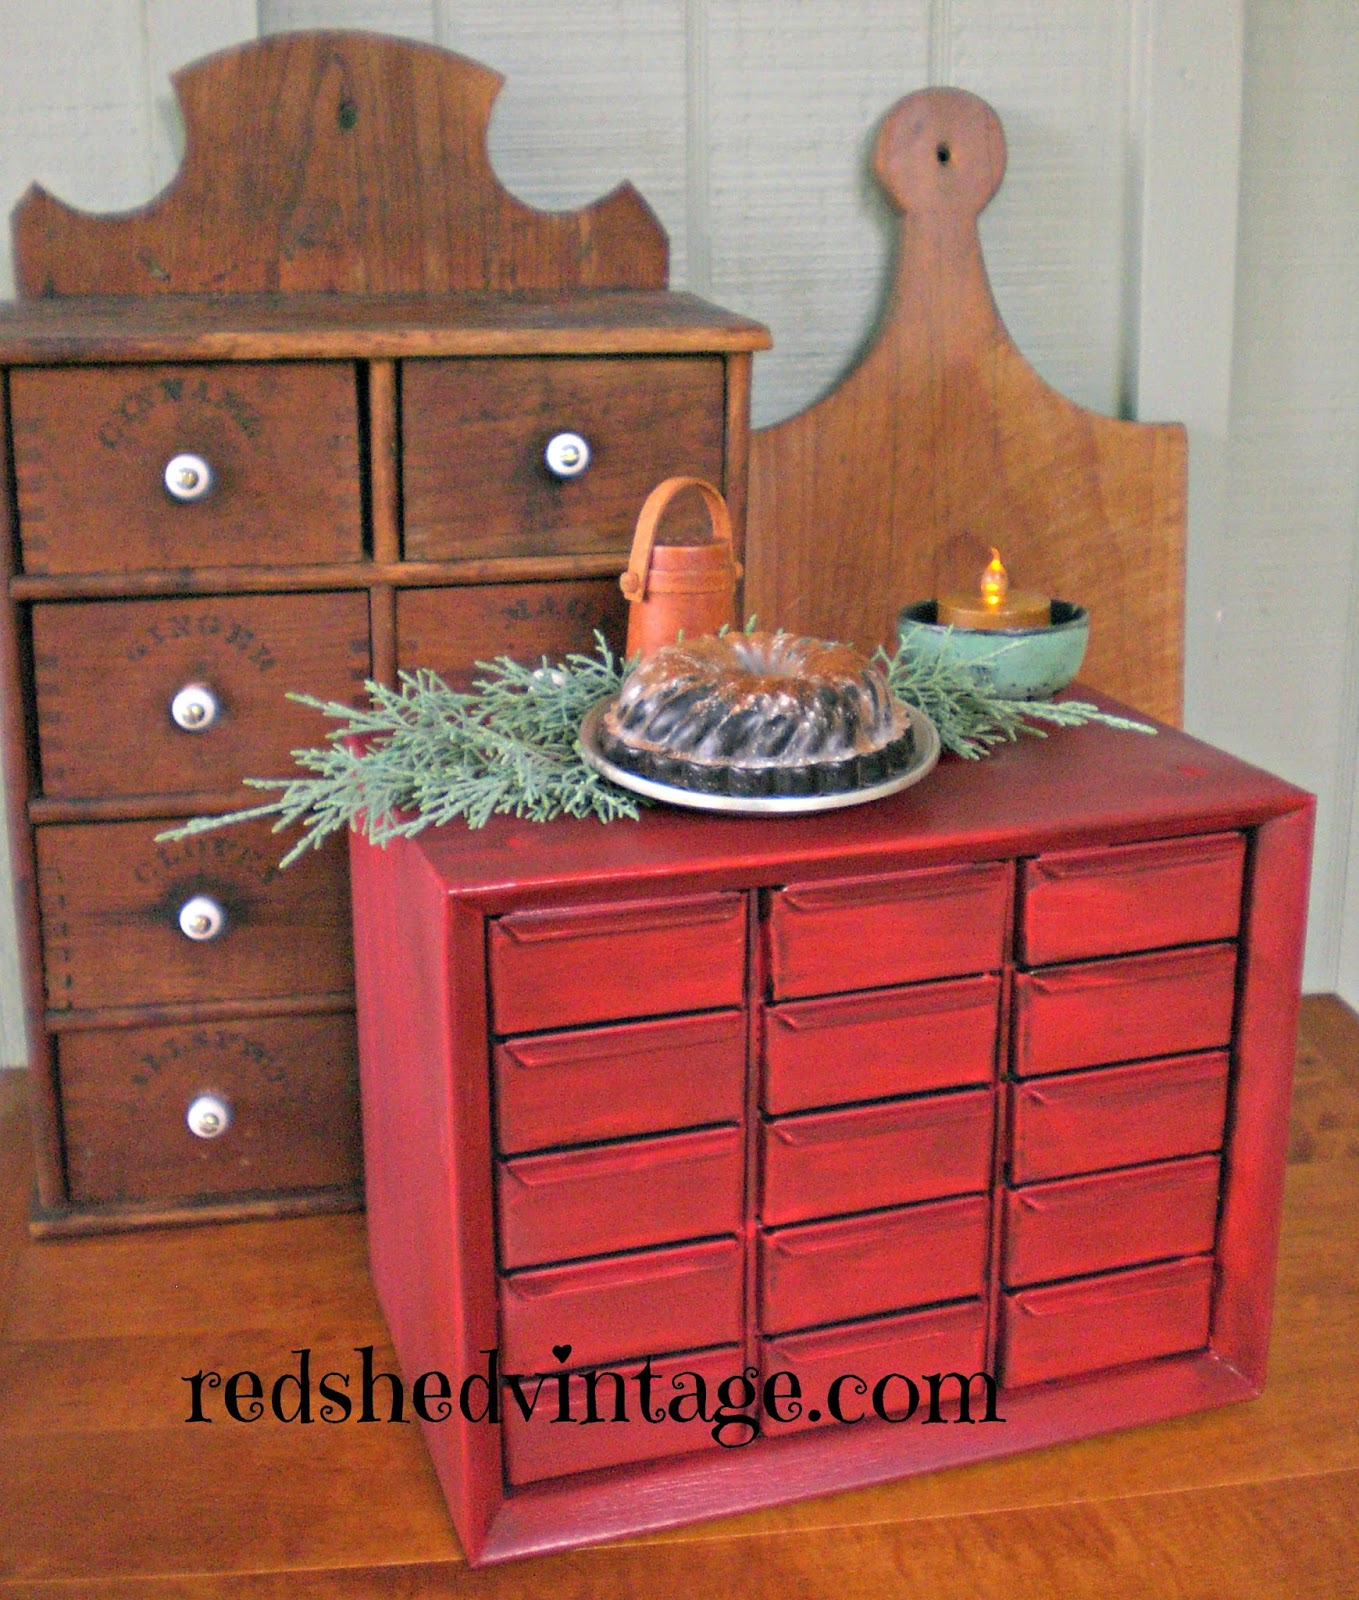
An inexpensive alternative to vintage spice boxes is to convert a wooden cassette tape rack into a make-do storage cabinet. An overabundance of these outdated cassette cubbies can be found at thrift stores and yard sales for next to nothing. Add some curiously sturdy peppermint tins as drawers, and you’ve got an inexpensive storage box with compartments for spices or teas!
 
I spray painted this cassette rack and some tin Altoids boxes flat black, then painted the sides using red interior house paint. Never one to throw away old drawer knobs, I happened to have some small metal spice box knobs & used a strong magnet on the inside of each box to hold the knob in place on the outside. The cassette slots are also a great size for organizing crafts supplies, especially rubber stamps & ink pads. © copyright 2011 redshedvintage.com
Check it out! This makeover of mine was featured in the Winter 2011 issue of A Primitive Place Magazine, page 105.


Thursday, July 11, 2013

Trash Talk Thursday: Raisin Rack Redeux


Hidden behind a stack of framed posters, the rustic wood of this old raisin drying rack caught my eye while browsing at a charity thrift store. As was the wall art trend of the 1960's, a poster had been cut and découpaged onto the 3 wooden slats, covering but also preserving the primitive wood which lie beneath. 

Using a wallpaper scorer, I made some small holes in the poster paper.  Then I mixed equal parts of hot tap water and liquid fabric softener in a spray bottle, spraying & gently scraping small sections with a plastic putty knife. When the poster was completely removed, I rinsed the residue with a hose & allowed the drying rack to dry in the sun. The slats allowed space to add 'S' hooks, providing a great place to hang bunches of herbs and flowers for drying.   


Thursday, June 20, 2013

Trash Talk Thursday: Faux Pewter

As featured in my former Trash To Treasure column, Fall 2012 issue of A Primitive Place & Country Journal Magazine (page 101) here is an easy way to fake pewter!
By using paint, I recycled this .50 ceramic 1980’s goose pitcher to what now looks like old Pewter...

 I sprayed a liberal coat of flat black generic spray paint, then added a light coat of Rustoleum Texture spray. When completely dry, I used my electric palm sander with medium grit paper to sand the texture just enough to create what looks like pitting on old Pewter, then painted the entire surface with Deco Art Metallic Dark Patina craft paint (purchased at Michael’s Arts & Crafts). For a darker patina look, I rubbed watered-down black acrylic paint over the ridges with a cotton rag.
This same process also works on plastic, metal, or wood ~ experiment on different surfaces. My own experimentation included plastic disposable serving utensils & spoons ~ the 'pewter' spoons came out looking just like the real thing for displaying on a spoon rack! 
(Note: once painted, wares are for decorative purposes only; not for food or beverage use)


Thursday, June 13, 2013

Trash Talk Thursday: Shake It Don't Bake It Prim

 
With a can of flat black spray paint and a plastic bag of ground spices, almost anything can be made prim. Even plastic perfume decanters such as these baby shoes, a .25 yard sale find.
After wiping clean with a damp rag, I waited until the shoes were dry before spraying a light even coat of Walmart’s $1.00 flat black spray paint. When dry, I placed one shoe at a time into a Ziploc bag half full of cinnamon, ginger, and allspice (all purchased at Dollar Tree) sealing the top before shaking & rubbing the spices over the painted finish, as if breading a chicken leg with Shake & Bake for oven-fried cooking. When the surface was well coated, I shook the excess spice mixture over the bag. The bag of spices can be used over & over again! This process also works well for transforming other surfaces which will be used for display only, including wax, metal, wood, plaster, glass, ceramic, clay, plastic, fabric, and even paper. Just think of all the recyclable junk you can shake prim!
copyright 2013 www.redshedvintage.com


Thursday, June 6, 2013

Trash Talk Thursday: Not So Fruity Peg Rack


Watermelons and shaker pegs were both popular decorating motifs in the 1980’s, with this $1.00 thrift store score featuring plenty of both.
After sanding the painted melons with medium grit sandpaper, I covered the shelf with 2 coats of flat Federal Blue wall paint. When dry, I lightly sanded around the edges, then brushed off the paint dust. Noticing the carved half circles resembled bunting flags, I decided to cut & glue some paper flags from an old catalog.

Once the wood glue was completely dry, I gently wiped water-based wood stain over the entire surface with a cotton rag, for a time-worn (not so fruity)patriotic look.

Happy Summer!
copyright 2013 www.redshedvintage.com


Thursday, May 30, 2013

Trash Talk Thursday: Repurposed Planter Dough Box


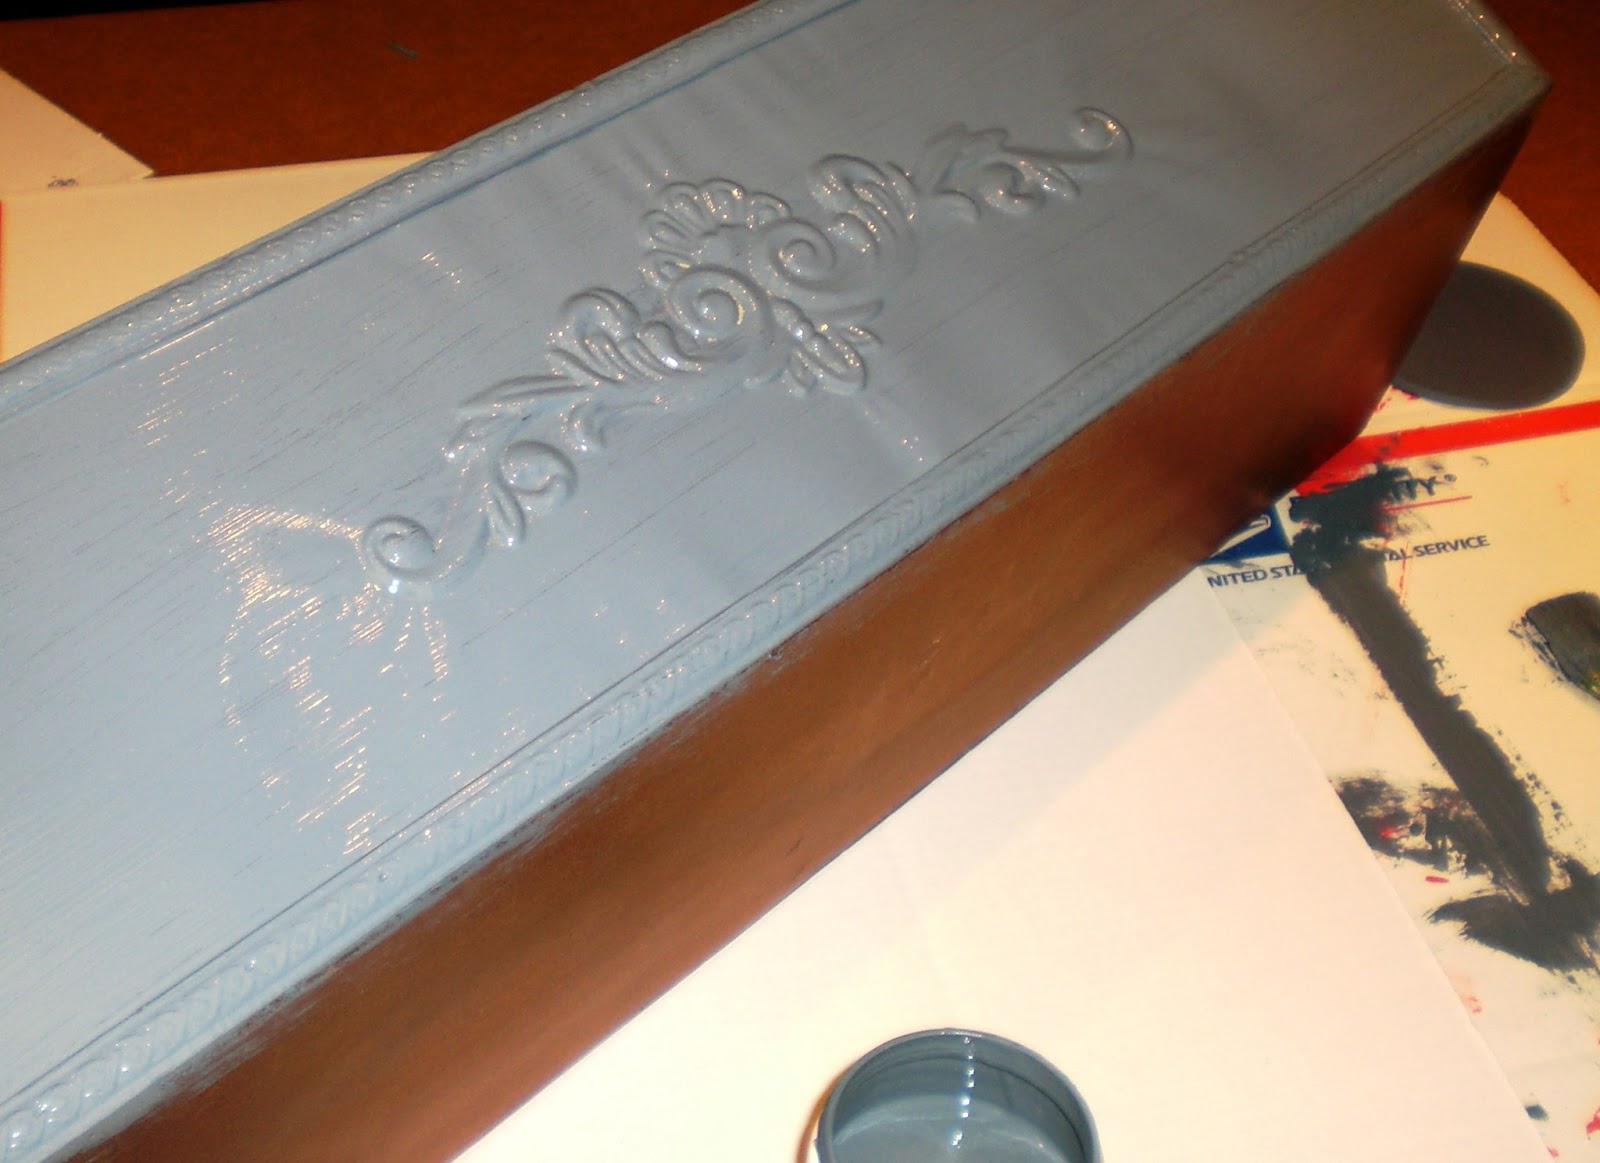
While antique dough boxes are great for displaying wooden bowls, a modern day planter can be a much cheaper alternative for those of us on a tight decorating budget! This newer wooden plant tote box was a $2.00 thrift store find, just the right size for my collection of farmhouse dough bowls.
While the sides of this wooden box were already embellished with embossed metal panels, a carved wooden applique/onlay can be glued to any planter box for an artistic touch, available at most home improvement, hardware, or craft supply stores.


Using a $1.00 can of 'oops' mistinted flat blue wall paint sample from Home Depot, I brush painted 2 coats over the entire surface, allowing 1 hour drying time between coats.


The next day, I very lightly sanded the edges with a piece of fine grit sandpaper to add an aged primitive look, dusting the excess powder with a dry rag. As a final finish, I dipped a clean cotton rag in Ace Hardware's oil-based Walnut wood stain, rubbing an even coat over the entire surface & allowing a couple of days drying time before using.

copyright 2013 www.redshedvintage.com


Wednesday, May 8, 2013

Trash Talk Thursday: Wedding Love Notes

Wedding season is approaching, so I'll feature some uniquely inexpensive wedding décor and gift ideas in the next few weeks!
A great wedding décor or bridal shower gift idea is a simple mailbox for holding cards and/or gift cards on that special day. 
You can place the 1st card inside to demonstrate, so guests will follow.
While thrift stores are a great source for cheap vintage mail boxes, you can still find them new & Made in U.S.A. at local hardware stores such as Ace Hardware.
I found this slightly rusted & dented vintage metal mailbox for $1.00 at a thrift store, and gave it a good soap and water cleaning before covering with 2 coats of flat red wall paint (To Die For Red, Better Homes & Gardens paint from Walmart)  which I later sealed with a hand-rubbed coat of Walnut wood stain. copyright 2013 www.redshedvintage.com


Thursday, March 28, 2013

Trash Talk Thursday: Sew Simple Potting Bench!

My Trash Talk Tutorial Tuesdays will now be happening on Thursdays! We're in the middle of packing our entire house up for an exciting move, and Tuesdays have gotten mighty busy around here.
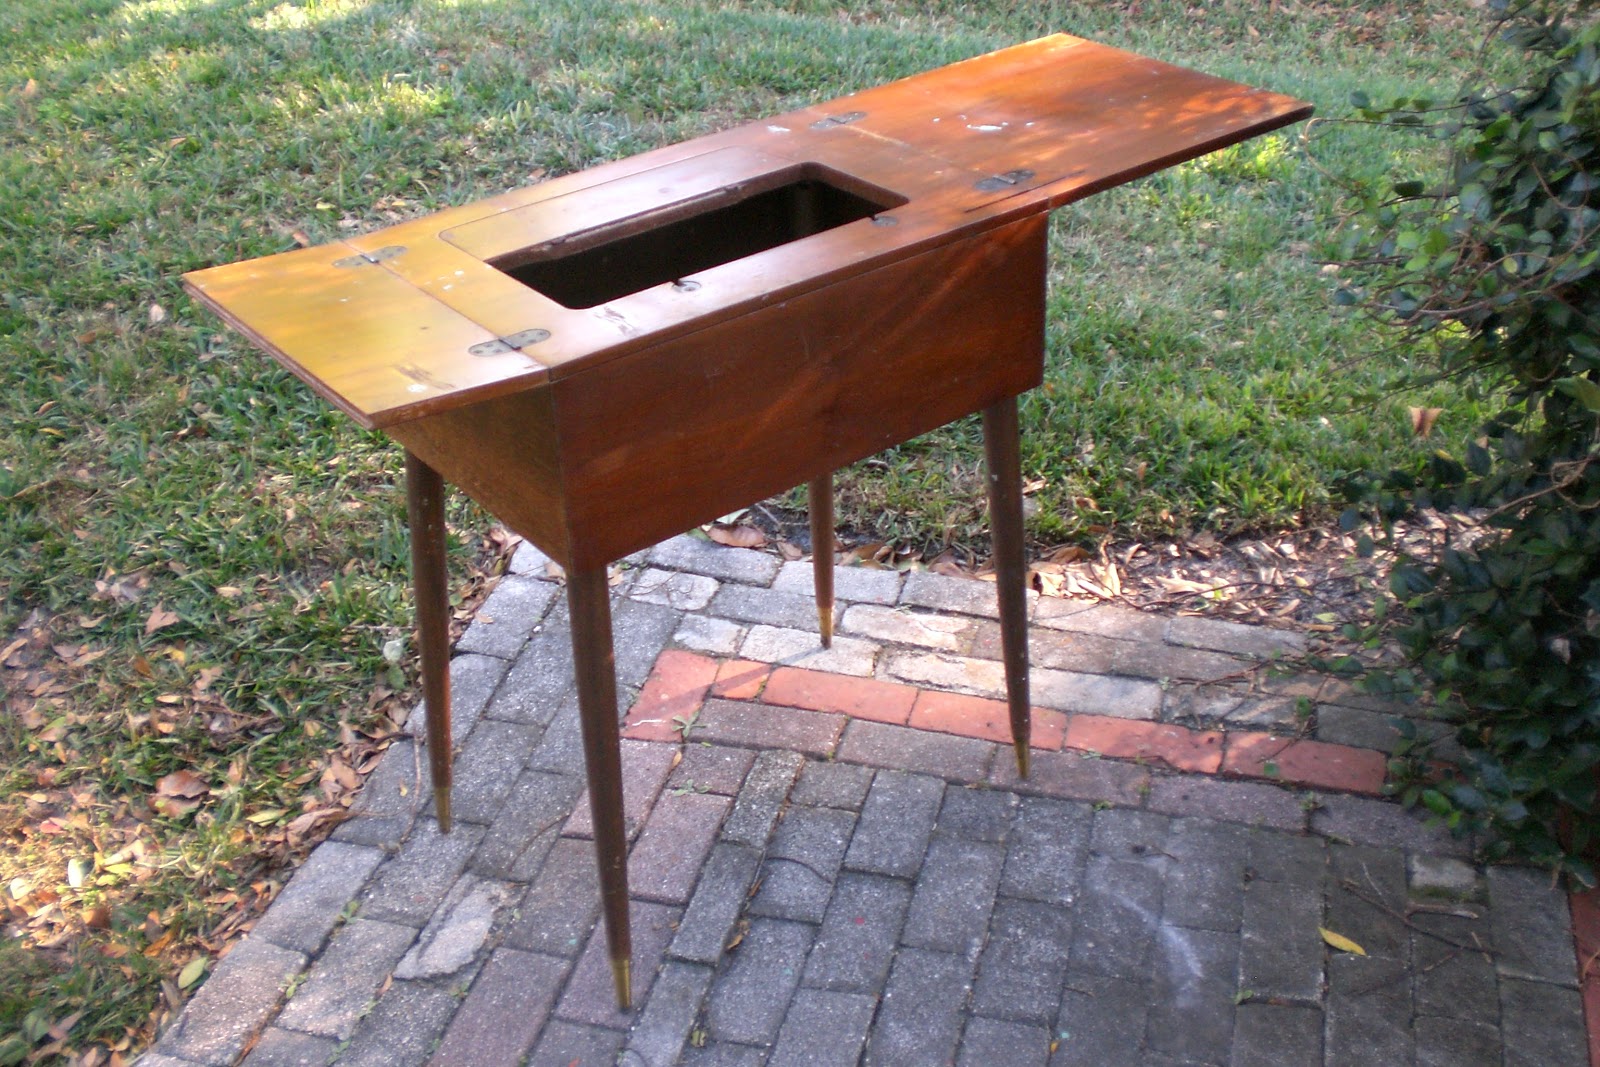
This week I'm sharing a trash to treasure portable potting bench ~ upcycled from a sewing table I pulled out of a neighbor's trash!
Sew Simple Potting Bench
I dragged this sewing machine table out of a neighbor’s trash, knowing it would come in handy for something. As luck would have it, I also found a small (plumber’s sample? R.V. sink?) plastic sink at a yard sale for $1.00 which fit perfectly in the hole where a sewing machine once sat!
Using red semi-glass oil based exterior house paint, I applied just one liberal coat on the entire surface of the table and let it dry, for color as well as protection in the outdoor elements. I added a mesh sink strainer to the lightweight plastic sink, plopped it into the open center, and now have a simple plant-potting work bench to tote around the yard as needed! The top still folds for storage, and the bench doubles as an outdoor beverage bar by adding ice & canned drinks in the sink. 'Sew' simple!

copyright 2013 www.redshedvintage.com