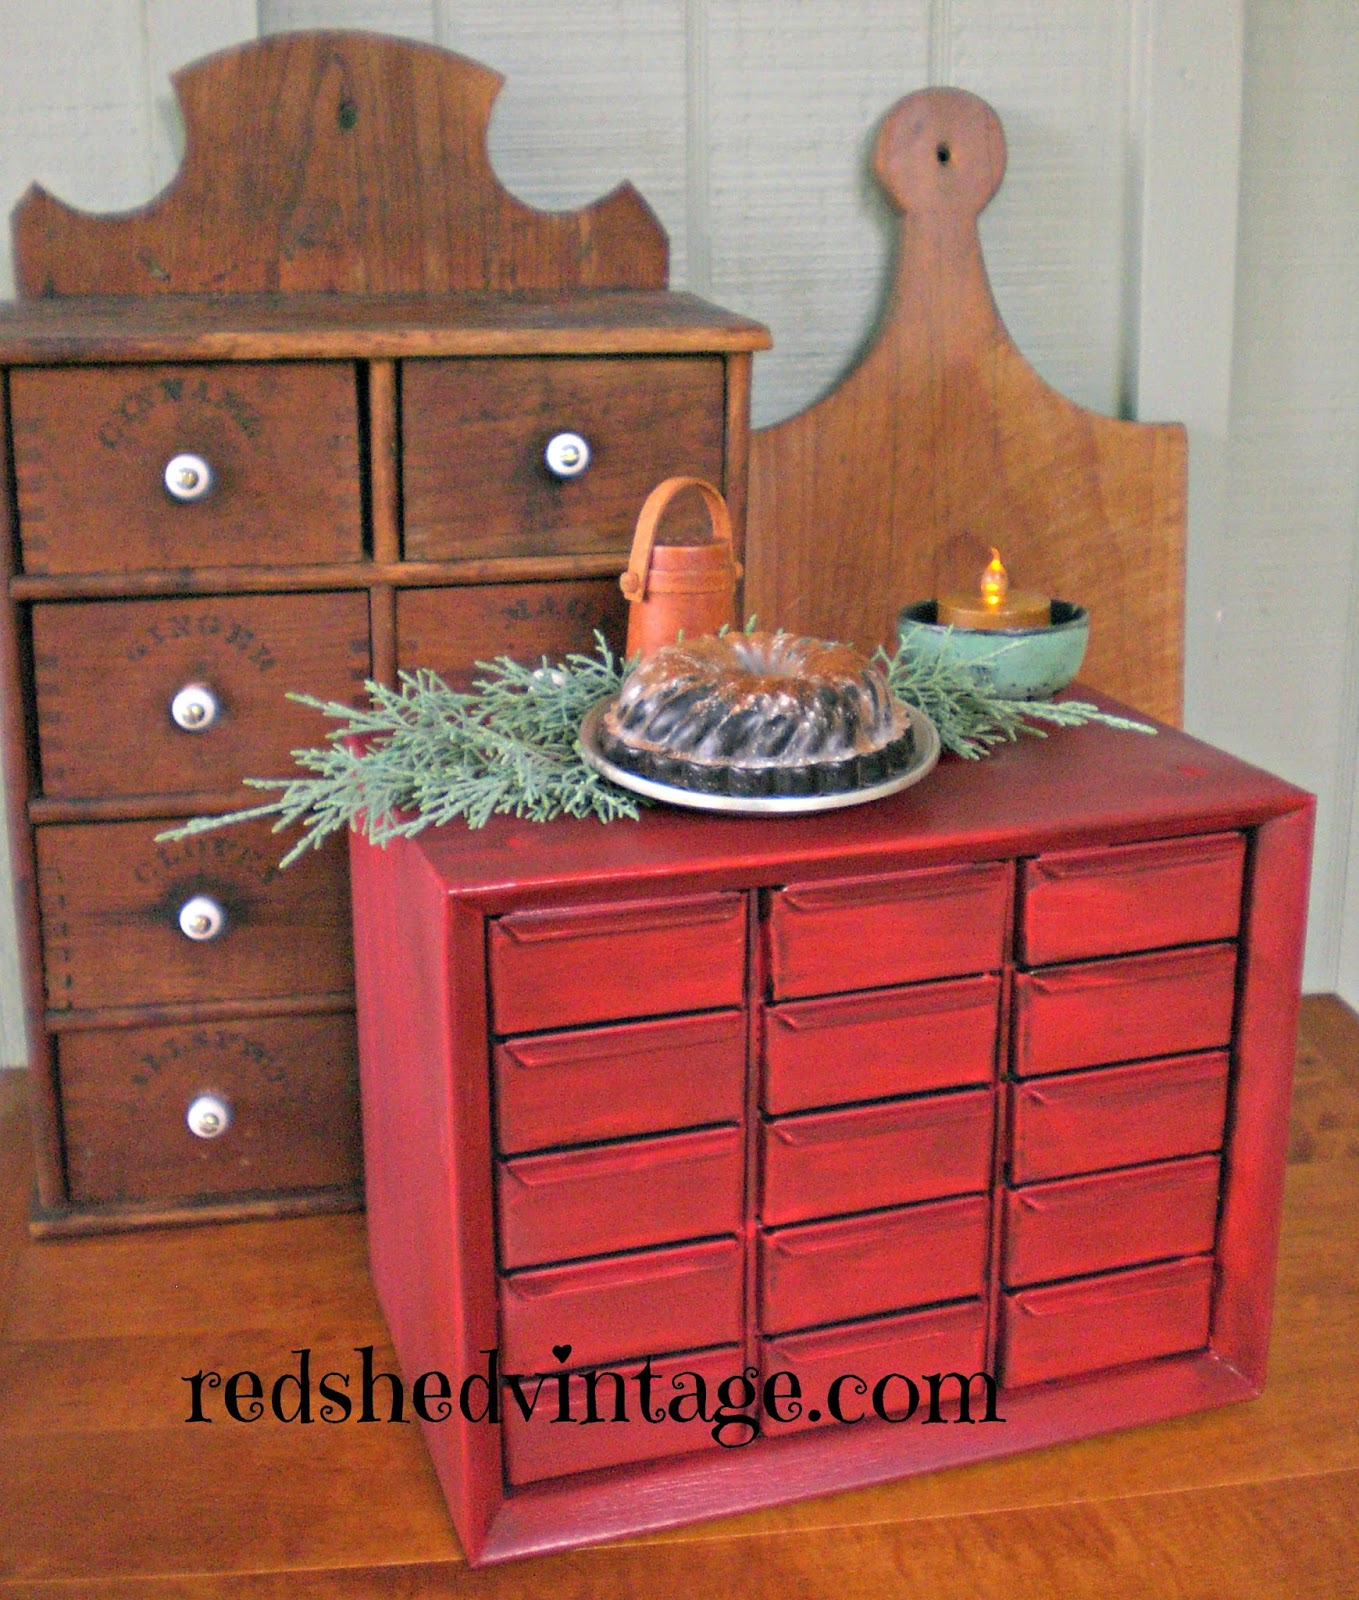
| Spice boxes and apothecary cabinets conjure up warm thoughts of colonial hearth cooking. Once used as compartmentalized storage of herbs & spices or apothecary needs and often made of wood or tin with many drawers, these storage units served a valuable purpose and are still very popular today. They can also be very expensive. To make-do without making wallet empty, look no further than the garage nut house for a wonderful alternative spice box/apothecary cabinet! ~ Check it out! This makeover of mine was featured in the Winter 2011 issue of A Primitive Place Magazine, page 104 ~ After making sure that the sturdy little house of many drawers won’t be sorely missed, empty & clean the plastic or metal bin drawers in a dishpan of soapy warm water & dry completely, then wipe the cabinet unit with a damp rag. When dry, apply a liberal coat of flat spray paint on the drawer fronts & cabinet. Paint desired color, using interior flat or matte, then when dry rub on stain & sealer to desired antique finish. If extra durability is desired, follow with a protective coat of clear acrylic spray. Spice names can easily be painted or stamped using acrylic arts and crafts paint. I purchased a tiny set of alphabet letters for $1.00 at Michaels recently, and dipped the ends in black paint to stamp on the finished drawers. © copyright 2011 redshedvintage.com | |
Showing posts with label Revived. Show all posts
Thursday, September 12, 2013
Trash Talk Thursday: Spice Box from a Nut House
Labels:
A Primitive Place Magazine,
Apothecary,
Bolts,
Box,
Cabinet,
DIY,
Drawers,
Nuts,
Organizer,
Primitive,
Rack,
Reclaimed,
Recycled,
Red,
Red Shed Vintage,
Refinished,
Refurbished,
Repurposed,
Revived,
Spice
Thursday, July 18, 2013
Trash Talk Thursday: Industrial Prim
When looking for primitive shelving options for storage or display, don’t overlook industrial metal racks! I found this sturdy old GE Motors auto store display for just $4.00 at a thrift store.
After removing the back board & rubber mats, I wiped it clean and spray painted the entire metal unit a uniform shade of Fire Red (from Walmart, about $1.50) then painted the backboard flat exterior Black (also from Walmart, cheap 'oops' reduced price paint!)
The extra sturdy construction is great for stacking boxes and drawers for storage of heavier household or hobby supplies, and the flat black backboard now doubles as a chalkboard!
copyright 2013 www.redshedvintage.com
After removing the back board & rubber mats, I wiped it clean and spray painted the entire metal unit a uniform shade of Fire Red (from Walmart, about $1.50) then painted the backboard flat exterior Black (also from Walmart, cheap 'oops' reduced price paint!)
The extra sturdy construction is great for stacking boxes and drawers for storage of heavier household or hobby supplies, and the flat black backboard now doubles as a chalkboard!
copyright 2013 www.redshedvintage.com
Wednesday, April 3, 2013
Trash Talk Thursday Tutorial: Painting & Distressing Vintage Furniture
If you've been wanting to revive some scratched up old furniture but thought you needed fancy paint products or kits, read on!
As we prepared to move into a bright new townhouse, I had decided it was time to do some furniture painting of my own. First on the list was reviving the scratched up hand-me-down 1950's 4-piece bedroom furniture set!
Inexpensive items used for my overhaul:
Flat charcoal wall paint ($3.00 gallon 'oops' paint from Walmart, even better!)
Ace Hardware Oil Based Wood Stain & Sealer
Paintbrushes, cotton rags
If you don't know whether or not your furniture piece is a valuable antique, you might want to get some advice from a professional antique dealer before painting or altering the finish. Some clues as to an item's age can sometimes be found on the back or bottom of the piece, in the form of a furniture company or store sticker, stamp, or product #. Machine or factory manufactured furniture pieces usually have some sort of company logo. You might also notice square/rectangular old nails instead of newer round nails in the joints; phillip's head screws instead of flat ones; or note whether the drawers were machine or hand dovetailed to better guess an item's age. Until the1880's, dovetailed corner joints were hand cut with chisel and hammer (crooked, with cuts varying in size & shape, not uniform.) After the 1880's, many furniture companies mass-produced furniture with industrial machines, including machine-cut dovetailed joints (uniform in size & shape.) Keep in mind that machine dovetailed pieces are still being made nowadays, even some inexpensive Ikea products have machine dovetailed edges. Here are 2 dovetailed drawer examples:
Once you've determined that your furniture isn't a rare priceless antique, wipe the surface with a lightly dampened wash cloth to clean for painting, and allow the surface to dry. I like using flat wall paint because I prefer a non-shiny surface, but you can test whatever paint you'd like to use on a small area. Decide whether you want to remove the hardware to retain the original finish, or leave it on for painting. I liked the patina on the brass drawer pulls, so I removed them & soaked in warm water with a little squirt of dishwashing soap.
Using a paintbrush, apply 2 light coats of paint in the same direction ~ allowing drying time between coats. When paint has completely dried, you can add some distressed age if you'd like ~ either by hand or with an electric mouse sander ~ using fine grit sandpaper (skip this step if you'd prefer a neater look). Wearing a painter's mask & protective eye ware, lightly sand around the edges and/or where ware would be most likely to occur naturally from years of use.
Once you're happy with the distressed finish, very gently wipe the dust with a slightly damp cotton rag, using single strokes to avoid lifting the paint off the surface. If you find that you've rubbed too vigorously, stop and add some paint over the peeling paint, allowing time for the patched areas to dry.
Once the piece is dry and free of debris, you can seal & darken the finish by applying a hand-rubbed coat of oil based wood stain. I prefer to use 'natural' colored stain over dark paint colors, or 'walnut' over light paint colors; experiment on a paint stirrer to see which you prefer. Wearing gloves, dip a clean (lint free) cotton rag into the stain, then apply even strokes in the same direction over the painted surface. You might want to use a small paintbrush, sponge, or q-tip to get the stain into crevices and corners. Wipe excess stain, and allow a few days drying time ~ preferably somewhere with low humidity. Reattach hardware, and enjoy several more years of use! If you decide you don't like the color or finish, just start all over again with a different color. (Note: for my video tutorial showing this process on a much smaller project, click here)
As someone who usually paints/distresses/antiques vintage primitives of a much smaller nature, I must say that I have a newly gained appreciation for those who refinish big furniture for a living! Between lugging the pieces back and forth to my workshop and crawling around on the concrete floor to paint & stain, I'm feeling mighty sore after just this one set of furniture.
I even treated myself to a manicure when the hefty chore was finally finished ~ can you guess what color nails I chose? Have a great week, everyone...
As we prepared to move into a bright new townhouse, I had decided it was time to do some furniture painting of my own. First on the list was reviving the scratched up hand-me-down 1950's 4-piece bedroom furniture set!
Inexpensive items used for my overhaul:
Flat charcoal wall paint ($3.00 gallon 'oops' paint from Walmart, even better!)
Ace Hardware Oil Based Wood Stain & Sealer
Paintbrushes, cotton rags
If you don't know whether or not your furniture piece is a valuable antique, you might want to get some advice from a professional antique dealer before painting or altering the finish. Some clues as to an item's age can sometimes be found on the back or bottom of the piece, in the form of a furniture company or store sticker, stamp, or product #. Machine or factory manufactured furniture pieces usually have some sort of company logo. You might also notice square/rectangular old nails instead of newer round nails in the joints; phillip's head screws instead of flat ones; or note whether the drawers were machine or hand dovetailed to better guess an item's age. Until the1880's, dovetailed corner joints were hand cut with chisel and hammer (crooked, with cuts varying in size & shape, not uniform.) After the 1880's, many furniture companies mass-produced furniture with industrial machines, including machine-cut dovetailed joints (uniform in size & shape.) Keep in mind that machine dovetailed pieces are still being made nowadays, even some inexpensive Ikea products have machine dovetailed edges. Here are 2 dovetailed drawer examples:
| Hand dovetailed antique 1800's drawer joint (left) and machine dovetailed (right) vintage 1950's drawer joint |
Once you've determined that your furniture isn't a rare priceless antique, wipe the surface with a lightly dampened wash cloth to clean for painting, and allow the surface to dry. I like using flat wall paint because I prefer a non-shiny surface, but you can test whatever paint you'd like to use on a small area. Decide whether you want to remove the hardware to retain the original finish, or leave it on for painting. I liked the patina on the brass drawer pulls, so I removed them & soaked in warm water with a little squirt of dishwashing soap.
Using a paintbrush, apply 2 light coats of paint in the same direction ~ allowing drying time between coats. When paint has completely dried, you can add some distressed age if you'd like ~ either by hand or with an electric mouse sander ~ using fine grit sandpaper (skip this step if you'd prefer a neater look). Wearing a painter's mask & protective eye ware, lightly sand around the edges and/or where ware would be most likely to occur naturally from years of use.
Once you're happy with the distressed finish, very gently wipe the dust with a slightly damp cotton rag, using single strokes to avoid lifting the paint off the surface. If you find that you've rubbed too vigorously, stop and add some paint over the peeling paint, allowing time for the patched areas to dry.
Once the piece is dry and free of debris, you can seal & darken the finish by applying a hand-rubbed coat of oil based wood stain. I prefer to use 'natural' colored stain over dark paint colors, or 'walnut' over light paint colors; experiment on a paint stirrer to see which you prefer. Wearing gloves, dip a clean (lint free) cotton rag into the stain, then apply even strokes in the same direction over the painted surface. You might want to use a small paintbrush, sponge, or q-tip to get the stain into crevices and corners. Wipe excess stain, and allow a few days drying time ~ preferably somewhere with low humidity. Reattach hardware, and enjoy several more years of use! If you decide you don't like the color or finish, just start all over again with a different color. (Note: for my video tutorial showing this process on a much smaller project, click here)
As someone who usually paints/distresses/antiques vintage primitives of a much smaller nature, I must say that I have a newly gained appreciation for those who refinish big furniture for a living! Between lugging the pieces back and forth to my workshop and crawling around on the concrete floor to paint & stain, I'm feeling mighty sore after just this one set of furniture.
I even treated myself to a manicure when the hefty chore was finally finished ~ can you guess what color nails I chose? Have a great week, everyone...
| Trash to Treasure fingers, aaaah |
| Dough box end tables updated with blue bottoms |
Subscribe to:
Posts (Atom)


