Showing posts with label Cabinet. Show all posts

Wednesday, June 11, 2014

Covering Country Clutter with Chalkboards


I love using chalkboard paint to cover 1980's country motifs for a simpler look! Not only does it cut down on the visual clutter, it also creates an ever-changeable message board. The flat black color goes with anything ~ even if the chalkboard is left blank it'll look good.
I picked this little kitchen shelf up at a thrift store. Using a small screwdriver, I lifted the plastic sign out from the center and sanded off most of the engraved country motif. After washing & drying it, I sprayed 2 light coats of Rustoleum Chalkboard Paint onto the surface & set it aside to dry.
I painted the shelf using 1 red coat of Plaid's new DecoArt Chalky Finish Paint  (Romance) which has great adhesion coverage! Since it dries so quickly, I was able to sand/distress the same day, just around the edges to add an aged look. After dusting the sanded edges with a clean paint brush, I rubbed an even coat of oil-based Walnut furniture stain over the surface & allowed a couple of days drying time. Using wood glue, I reattached the plastic chalkboard  in it's spot ~ and now have a cute garden room shelf with drawers to hold my seeds.  


redshedvintage.com© copyright 2014


Monday, January 20, 2014

Putting Up A Faux Front

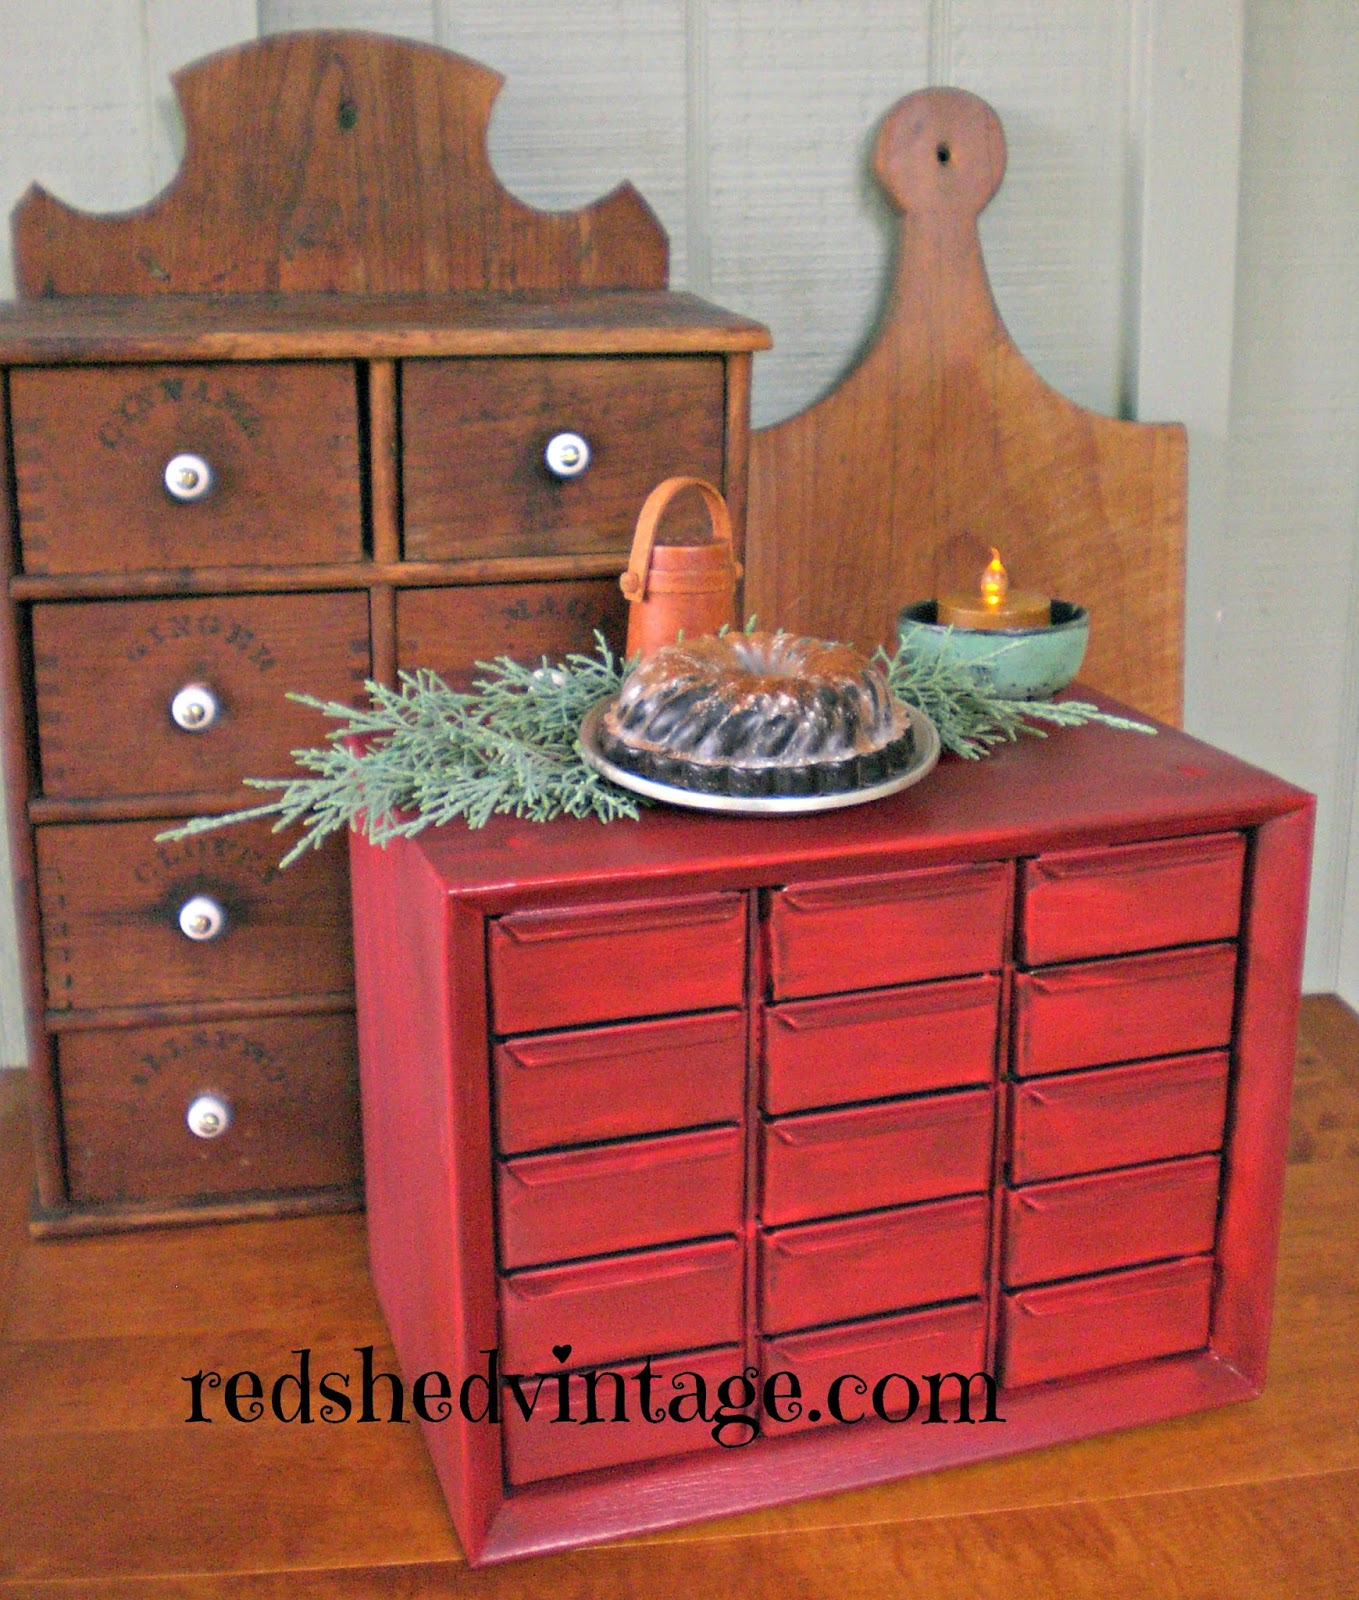
Apothecary cabinets provide lots of little drawers for stashing stuff, but here's another way to utilize the space behind a 'cabinet' ~ go faux! Woodcrafters and unfinished wooden furniture stores often carry faux-front appliance covers of various sizes ~ made to look like an apothecary cabinet in the front but open from the back ~ for placing over toaster ovens or other small countertop appliances.
I picked a used one up @ a thrift shop, and decided to give it a more primitive finish.

First, I removed the fake button drawer pulls. Then I sprayed a light base-coat primer of generic flat Black spray paint across the front & sides. Next, I applied a coat of flat latex To Die For Red (Better Homes & Gardens wall paint, Walmart) and allowed proper drying time before lightly sanding the edges with extra fine sandpaper, for a distressed aged look. Last, I rubbed an even coat of Walnut wood stain across the surface with a clean cotton rag. 
After 24 hours drying time, I  drilled larger knob holes to insert the more realistic looking peg pulls (from the unpainted wood crafts section @ Hobby Lobby) adding a dab of wood glue in each hole before twisting the knobs in.
Faux-front cabinets are also great for hiding bathroom supplies, counter clutter, cookbooks, and of course ~ handy kitchen appliances & gadgets you'd rather not leave hanging out. redshedvintage.com© copyright 2014


Thursday, September 12, 2013

Trash Talk Thursday: Spice Box from a Nut House

 
Spice boxes and apothecary cabinets conjure up warm thoughts of colonial hearth cooking. Once used as compartmentalized storage of herbs & spices or apothecary needs and often made of wood or tin with many drawers, these storage units served a valuable purpose and are still very popular today.
They can also be very expensive.
To make-do without making wallet empty, look no further than the garage nut house for a wonderful alternative spice box/apothecary cabinet!
~ Check it out! This makeover of mine was featured in the Winter 2011 issue of A Primitive Place Magazine, page 104 ~
After making sure that the sturdy little house of many drawers won’t be sorely missed, empty & clean the plastic or metal bin drawers in a dishpan of soapy warm water & dry completely, then wipe the cabinet unit with a damp rag. When dry, apply a liberal coat of flat spray paint on the drawer fronts & cabinet. Paint desired color, using interior flat or matte, then when dry rub on stain & sealer to desired antique finish. If extra durability is desired, follow with a protective coat of clear acrylic spray.
Spice names can easily be painted or stamped using acrylic arts and crafts paint. I purchased a tiny set of alphabet letters for $1.00 at Michaels recently, and dipped the ends in black paint to stamp on the finished drawers. © copyright 2011 redshedvintage.com


Tuesday, March 5, 2013

Trash Talk Tuesdays: DIY Pie Safe Doors Rule

In a small measure of time, you can convert a plain bookshelf, cabinet or dresser into a primitive pie safe. The 'rule' of thumb: keep it simple! The use of vintage or new rulers as door frames will help.
 Using punched tin panels purchased from Irvin’s Country Tinware and yardstick rulers gathered from thrift shops & hardware stores, I created 2 doors to fit this old hallowed out radio cabinet I scored on trash night & painted. A dresser or book shelf would work just as well, as would chicken wire or screen instead of the tin panels.
To make your own tin punch panels from scraps of sheet metal or screen door kick panels, check out my youtube tutorial for making punched tin panels.
I measured the cabinet opening, then cut the yardsticks with a jigsaw to make front & back frames for the 2 doors (note: always use protective eye gear and follow power tool safety instructions) 

I sandwiched the punched tin panels between the ruler frames and drilled holes, adding some wood glue for reinforcement before sealing the corners of the make-do doors with wood screws. Finally, I added cabinet hinges to attach the doors on my cabinet ~ and now have a primitive pie safe cupboard!


Here's what the roadside rubble radio cabinet looked like when I first dragged it home ~ tune in next Tuesday to see how I revived & recycled it into a cool storage cabinet...


Follow me on Twitter
Follow me on YouTube
Follow me on Pinterest
Follow me on Etsy
Follow me on Facebook