Showing posts with label Upcycled. Show all posts

Wednesday, June 11, 2014

Covering Country Clutter with Chalkboards


I love using chalkboard paint to cover 1980's country motifs for a simpler look! Not only does it cut down on the visual clutter, it also creates an ever-changeable message board. The flat black color goes with anything ~ even if the chalkboard is left blank it'll look good.
I picked this little kitchen shelf up at a thrift store. Using a small screwdriver, I lifted the plastic sign out from the center and sanded off most of the engraved country motif. After washing & drying it, I sprayed 2 light coats of Rustoleum Chalkboard Paint onto the surface & set it aside to dry.
I painted the shelf using 1 red coat of Plaid's new DecoArt Chalky Finish Paint  (Romance) which has great adhesion coverage! Since it dries so quickly, I was able to sand/distress the same day, just around the edges to add an aged look. After dusting the sanded edges with a clean paint brush, I rubbed an even coat of oil-based Walnut furniture stain over the surface & allowed a couple of days drying time. Using wood glue, I reattached the plastic chalkboard  in it's spot ~ and now have a cute garden room shelf with drawers to hold my seeds.  


redshedvintage.com© copyright 2014


Friday, May 16, 2014

Sew~So To Star~Spangled Apothecary


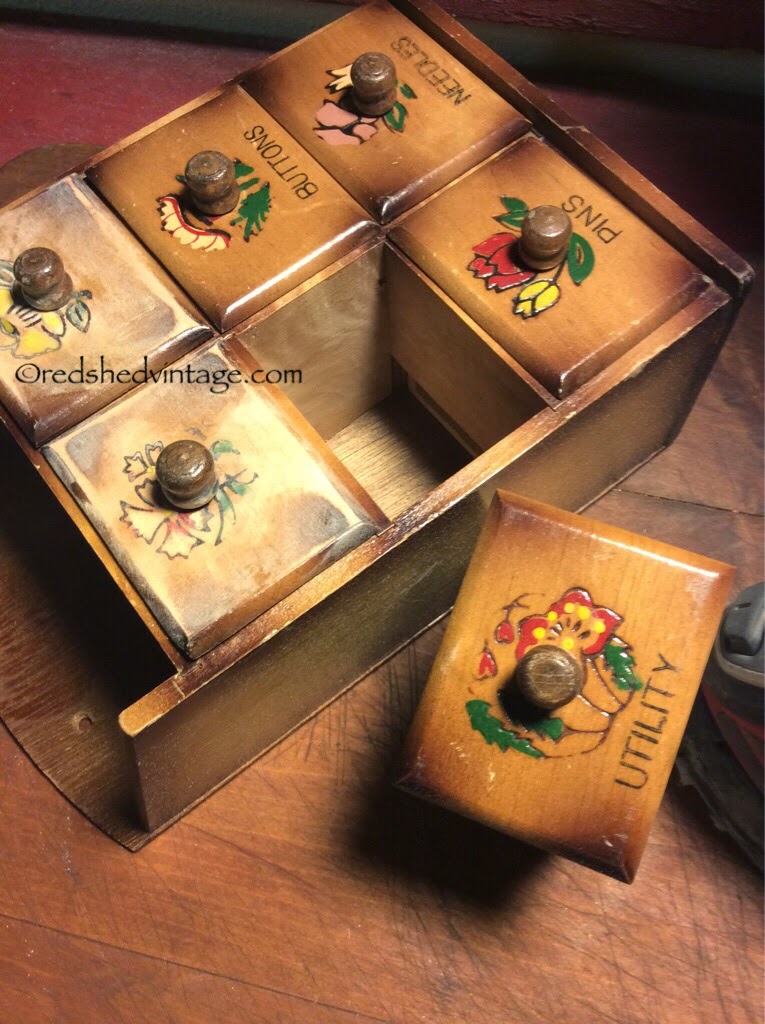
After several years of painting/distressing/antiquing vintage finds for others, it's nice to have some time to recycle some junque finds for myself lately! This week I scored this cute little sewing notions apothecary at a local thrift shop.

After removing the notions & motifs adorning the drawers with fine grit sandpaper, I applied a thin even basecoat of Vintage color Americana Décor Chalky Finish paint (available at Home Depot and Michael's).

Then I mixed equal parts Cobalt & Admiral Blue acrylic craft paint (.50 cents per bottle, Walmart) for a second coat, followed by a final dry-brush coat of Admiral to darken the color up a bit.
The next day, I used fine grit sandpaper to distress & age just around the edges, followed by wiping a light even coat of oil-based wood stain (Walnut) over the painted surface with a dry cotton rag, allowing a couple of days drying time.


I'm going to use the updated little cabinet to stash the patriotic & military odds & ends I've picked up through the years. 
Have a great week!
~Donna at Red Shed Vintage 

redshedvintage.com© copyright 2014 

Monday, February 3, 2014

Faux Pewter Chocolate Molds

This makeover of mine was featured in the Spring 2012 issue of A Primitive Place Magazine!

Sometimes the package is better than the gift, as was the case with these discarded clear plastic treat containers shaped like chocolate bunnies. These looked so much like antique chocolate molds, I decided to hang on to them and go with the faux. Faux Pewter, that is.
Using inexpensive flat black spray paint, I covered the exterior of these clear plastic candy holders. When dry, I added two coats of Dark Patina by DecoArt Dazzling Metallics (available at Michael’s Arts and Crafts) and allowed drying time. To add a darker patina look, I brushed on some Old English Scratch Cover, wiped the excess with a rag, and sealed with a liberal coat of clear acrylic gloss sealer spray. This same process also works great on discarded plastic egg containers, resulting in a new and improved way to recycle plastics and make holiday decorations on the cheap.
redshedvintage.com© copyright 2014


Thursday, October 31, 2013

Autumn Bowl!

 
Serving up salads with flair created a need for artful vessels back in the 1960's ~ 80's. Salad bowl sets in a variety of shapes and themes became a staple in kitchen serving ware, including  wooden bowls in the shape of different fruits to coincide with salad ingredients and/or pu-pu platter spreads. Apples, pears, pineapples, even acorns were popular salad serving themes.
I added even more flair to these thrift-store apple shaped wooden bowls, by painting/sanding/staining them different shades of orange ~ perfect for Autumn décor !  I used the largest bowl for trick~or~treat candies, the smaller bowls for Fall potpourri mix, pumpkin flavored coffee creamers, guest soaps in the bathroom, and displaying pumpkin scented wax shapes. Next week I'll share how I updated some pineapple shaped pu-pu platter bowls! © copyright 2013 redshedvintage.com
~ Have a safe & happy Halloween ~ 


Thursday, August 22, 2013

Trash Talk Thursday: Plastic Prims!


Home parties were all the rage in the 1960's - 80’s, and during that time companies such as Home Interiors produced some great plastic wall décor which were reproductions of antique cast iron or wood plaques. Sometimes labled Burwood, Dart or Homco, these lightweight treasures are plentiful at thrift stores and are easy to upcycle with a little paint. This large patriotic Eagle was a recent $2.00 score.
After lightly cleaning with a damp cloth, I sprayed a light coat of flat black spray paint.

It looked good enough to hang with just the black paint, but I decided to add some patriotic colors. Using Folk Art acrylic craft paint, I applied red, white, blue, and gold paint on the dimensional areas, as shown. When it dried completely, I wiped Minwax Stain & Sealer with a cotton rag and waited a few hours before hanging. If you'll be hanging your painted plastic prims outdoors, a coat of clear acrylic spray will help protect it from the elements.
Check it out! This makeover of mine was featured in the Winter 2011 issue of A Primitive Place Magazine, page 107
© copyright 2011 redshedvintage.com 
Here are some other painted plastic projects of mine, recycled using the same painting method:


Thursday, August 1, 2013

Trash Talk Thursday: A Greater Grater!

Vintage graters really stand out when displayed in front of electric or battery candle light. This newer grater featured a wooden frame with a drawer, perfect for housing a strand of battery operated LED lights for a cheerful kitchen sconce.


Since I won’t be using this for food purposes, I applied a light coat of flat black spray paint to make it look older, then painted the wood with flat interior Red Delicious. When it was dry, I rubbed Old English dark wood scratch cover over the surface, removing the excess with a dry cotton rag.
(Use caution when handling sharp metal graters)
I chose a battery operated set of LED lights from Dollar Tree, but you could also use a single bulb or strand of electric light(s) also available at discount stores.


Thursday, July 25, 2013

Trash Talk Thursday: Framed Display Boards!

Got some old frames? Convert them to display boards!
Recycled old frames make great memo or photo boards ~ here's a cheap and easy way to do it yourself. Whether for use as an ever-changing photo or treasure display, pinning to-do lists or business cards, a jewelry pin collection, or as a special gift for the college student leaving home for the first time ~ any wooden frame will work.
I chose assorted colors and sizes to make a batch of recycled frame boards (painted, distressed, and antiqued with wall paint) but unpainted wooden frames will work just as well.
You'll need a piece of project board (in the school supply section at Dollar Tree)
Scissors
Glue
Burlap (or fabric)
Frame
Using the frame as a template, I cut the project board to fit inside the frame & cut a piece of burlap large enough to wrap around the board. I spread some glue over the board with a sponge applicator (optional, a finger works just as well!) and flattened the burlap with a wallpaper roller (also optional, the palm of your hand works just as well) folding the excess edges over on the back. When the front was dry, I placed the board into the frame, cut the excess burlap off the back, and had cheap & easy bulletin style boards ~ ready for use with thumbtacks or pins!
copyright 2013 www.redshedvintage.com


Thursday, July 11, 2013

Trash Talk Thursday: Raisin Rack Redeux


Hidden behind a stack of framed posters, the rustic wood of this old raisin drying rack caught my eye while browsing at a charity thrift store. As was the wall art trend of the 1960's, a poster had been cut and découpaged onto the 3 wooden slats, covering but also preserving the primitive wood which lie beneath. 

Using a wallpaper scorer, I made some small holes in the poster paper.  Then I mixed equal parts of hot tap water and liquid fabric softener in a spray bottle, spraying & gently scraping small sections with a plastic putty knife. When the poster was completely removed, I rinsed the residue with a hose & allowed the drying rack to dry in the sun. The slats allowed space to add 'S' hooks, providing a great place to hang bunches of herbs and flowers for drying.   


Wednesday, May 8, 2013

Trash Talk Thursday: Wedding Love Notes

Wedding season is approaching, so I'll feature some uniquely inexpensive wedding décor and gift ideas in the next few weeks!
A great wedding décor or bridal shower gift idea is a simple mailbox for holding cards and/or gift cards on that special day. 
You can place the 1st card inside to demonstrate, so guests will follow.
While thrift stores are a great source for cheap vintage mail boxes, you can still find them new & Made in U.S.A. at local hardware stores such as Ace Hardware.
I found this slightly rusted & dented vintage metal mailbox for $1.00 at a thrift store, and gave it a good soap and water cleaning before covering with 2 coats of flat red wall paint (To Die For Red, Better Homes & Gardens paint from Walmart)  which I later sealed with a hand-rubbed coat of Walnut wood stain. copyright 2013 www.redshedvintage.com


Thursday, March 28, 2013

Trash Talk Thursday: Sew Simple Potting Bench!

My Trash Talk Tutorial Tuesdays will now be happening on Thursdays! We're in the middle of packing our entire house up for an exciting move, and Tuesdays have gotten mighty busy around here.
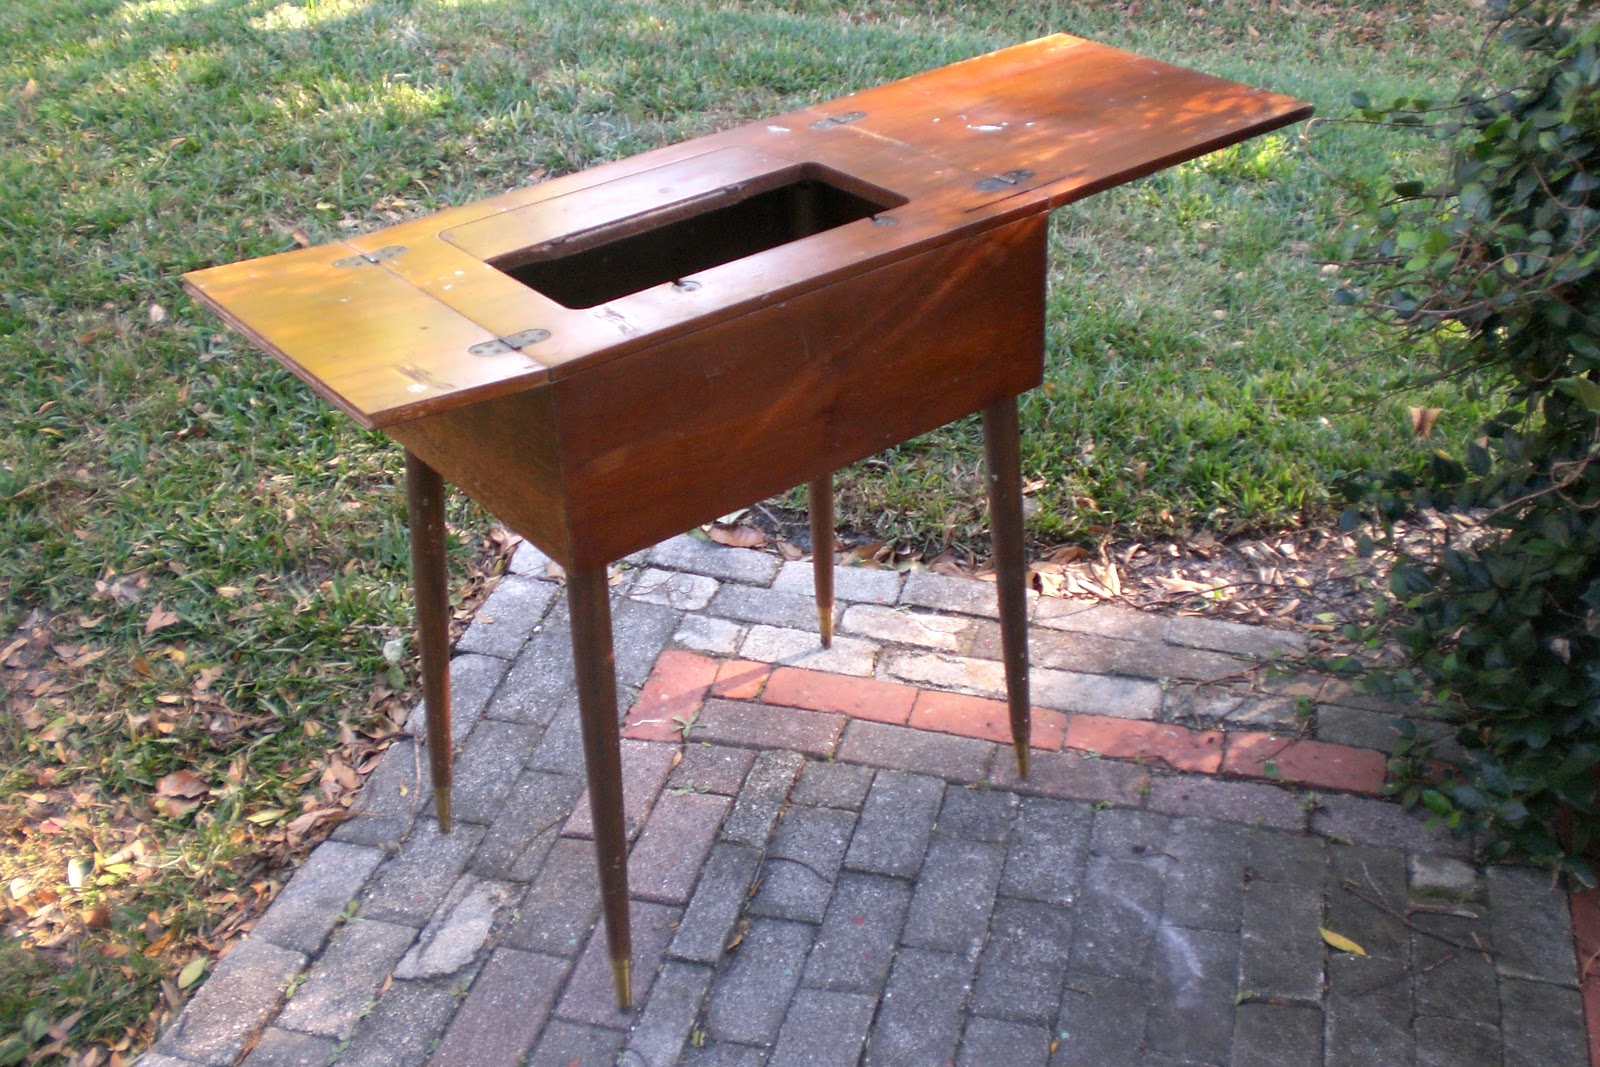
This week I'm sharing a trash to treasure portable potting bench ~ upcycled from a sewing table I pulled out of a neighbor's trash!
Sew Simple Potting Bench
I dragged this sewing machine table out of a neighbor’s trash, knowing it would come in handy for something. As luck would have it, I also found a small (plumber’s sample? R.V. sink?) plastic sink at a yard sale for $1.00 which fit perfectly in the hole where a sewing machine once sat!
Using red semi-glass oil based exterior house paint, I applied just one liberal coat on the entire surface of the table and let it dry, for color as well as protection in the outdoor elements. I added a mesh sink strainer to the lightweight plastic sink, plopped it into the open center, and now have a simple plant-potting work bench to tote around the yard as needed! The top still folds for storage, and the bench doubles as an outdoor beverage bar by adding ice & canned drinks in the sink. 'Sew' simple!

copyright 2013 www.redshedvintage.com