Thursday, September 19, 2013

Trash Talk Thursday: A Two Buck Sawbuck


A $1.00 folding wooden TV tray + a $1.00 cutting board = one easy 2 buck sawbuck! I combined these cheap thrift store finds to create some extra holiday baking space.
Newer cutting boards are usually constructed of 3 separate wood pieces. Wearing safety goggles, I wedged a flat head screwdriver between the seams & tapped with a hammer to gently separate the board panels, using the 2 end pieces to create storage space below the table.
I drilled holes through the boards into the TV tray legs, then attached the boards with wood screws. Although the wood practically matched, I opted to add 2 coats of flat black paint which I later sanded around the edges for an aged look.

© copyright 2012 redshedvintage.com
~ Check it out! This makeover of mine was featured in the Winter 2012 issue of A Primitive Place Magazine, page 81 ~
Before


Thursday, September 12, 2013

Trash Talk Thursday: Spice Box from a Nut House

 
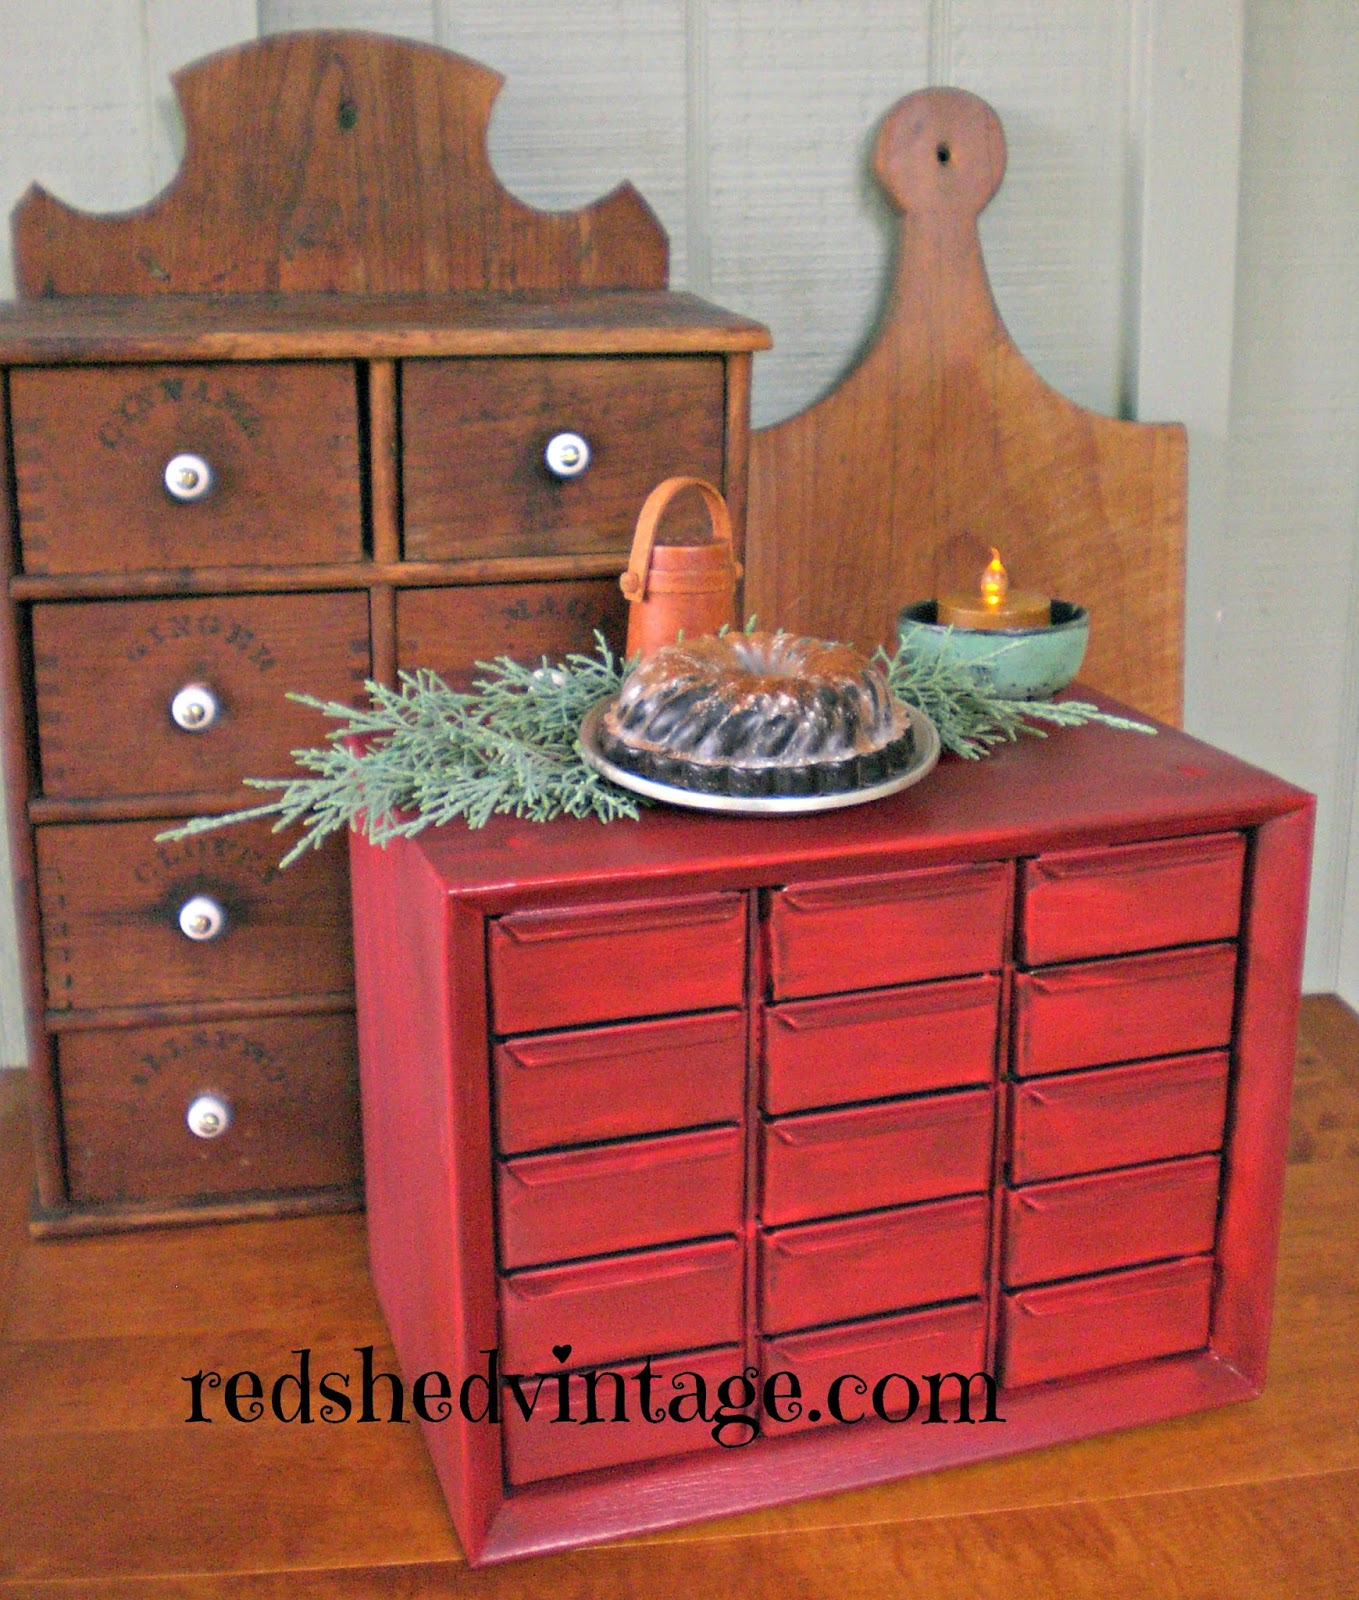
Spice boxes and apothecary cabinets conjure up warm thoughts of colonial hearth cooking. Once used as compartmentalized storage of herbs & spices or apothecary needs and often made of wood or tin with many drawers, these storage units served a valuable purpose and are still very popular today.
They can also be very expensive.
To make-do without making wallet empty, look no further than the garage nut house for a wonderful alternative spice box/apothecary cabinet!
~ Check it out! This makeover of mine was featured in the Winter 2011 issue of A Primitive Place Magazine, page 104 ~
After making sure that the sturdy little house of many drawers won’t be sorely missed, empty & clean the plastic or metal bin drawers in a dishpan of soapy warm water & dry completely, then wipe the cabinet unit with a damp rag. When dry, apply a liberal coat of flat spray paint on the drawer fronts & cabinet. Paint desired color, using interior flat or matte, then when dry rub on stain & sealer to desired antique finish. If extra durability is desired, follow with a protective coat of clear acrylic spray.
Spice names can easily be painted or stamped using acrylic arts and crafts paint. I purchased a tiny set of alphabet letters for $1.00 at Michaels recently, and dipped the ends in black paint to stamp on the finished drawers. © copyright 2011 redshedvintage.com


Thursday, September 5, 2013

Trash Talk Thursday: A Curiously Cheap Spice Box


An inexpensive alternative to vintage spice boxes is to convert a wooden cassette tape rack into a make-do storage cabinet. An overabundance of these outdated cassette cubbies can be found at thrift stores and yard sales for next to nothing. Add some curiously sturdy peppermint tins as drawers, and you’ve got an inexpensive storage box with compartments for spices or teas!
 
I spray painted this cassette rack and some tin Altoids boxes flat black, then painted the sides using red interior house paint. Never one to throw away old drawer knobs, I happened to have some small metal spice box knobs & used a strong magnet on the inside of each box to hold the knob in place on the outside. The cassette slots are also a great size for organizing crafts supplies, especially rubber stamps & ink pads. © copyright 2011 redshedvintage.com
Check it out! This makeover of mine was featured in the Winter 2011 issue of A Primitive Place Magazine, page 105.


Thursday, August 29, 2013

Trash Talk Thursday: Artful Twigs

Awhile back I ran across a rustic lodge lake plaque made from sticks on Pinterest, and have had it on my to-do-it-myself list ever since. (Thanks to pinterest.com, my to-do list is now long enough to last the rest of my life and then some!) 
This past weekend while I had the pleasure of babysitting my grand-dogter, Noodle ~ we walked along Lake Tarpon in search of suitable twig sticks for writing out the word 'Lake' on an old wooden plaque (found at a thrift shop for 50 cents.)
I sprayed my found tree-twigs with a pest control product before bringing them inside ( because it's  Florida ~ home of tropical bugs galore) and used snippers to cut the ends off twigs as needed. Once I had the word layed out as I liked it, I sprayed the twigs with clear acrylic sealer to bring out the wood hues (and further protect the indoors from that which lives outdoors) and used wood glue to attach the twigs to my plaque, allowing drying time overnight before hanging. © copyright 2013 redshedvintage.com 


Thursday, August 22, 2013

Trash Talk Thursday: Plastic Prims!


Home parties were all the rage in the 1960's - 80’s, and during that time companies such as Home Interiors produced some great plastic wall décor which were reproductions of antique cast iron or wood plaques. Sometimes labled Burwood, Dart or Homco, these lightweight treasures are plentiful at thrift stores and are easy to upcycle with a little paint. This large patriotic Eagle was a recent $2.00 score.
After lightly cleaning with a damp cloth, I sprayed a light coat of flat black spray paint.

It looked good enough to hang with just the black paint, but I decided to add some patriotic colors. Using Folk Art acrylic craft paint, I applied red, white, blue, and gold paint on the dimensional areas, as shown. When it dried completely, I wiped Minwax Stain & Sealer with a cotton rag and waited a few hours before hanging. If you'll be hanging your painted plastic prims outdoors, a coat of clear acrylic spray will help protect it from the elements.
Check it out! This makeover of mine was featured in the Winter 2011 issue of A Primitive Place Magazine, page 107
© copyright 2011 redshedvintage.com 
Here are some other painted plastic projects of mine, recycled using the same painting method:


Thursday, August 15, 2013

Trash Talk Thursday: Drop The Drawers!

 
 The next time you pass up a discarded old dresser or desk in the trash, stop & drop just the drawers! Vintage wooden drawers make handy primitive storage or display boxes and are easily stored on shelves, desk or counter top, in cupboards, hung on the wall, or stashed under the bed. Vintage sewing machine cabinets, vanity desks, even jewelry boxes are great drawer sources for recyclable drawer projects.
* Check it out! This makeover of mine has been published in A Primitive Place Magazine Fall 2012, and also in The Antique Register of Arizona Jan/Feb 2013 (See pages 10 and 47) *


I rescued these 4 dovetailed drawers from an antique vanity desk right before the garbage truck turned the corner. After a light dusting, I painted just the drawer fronts flat interior Lotus Green. When dry, I lightly sanded the corners and rubbed Minwax Rubbing Stain & Finish over the painted finish with a cotton rag.

The storage drawers can now be stacked or slid under furniture, or they also make nice wall shadowboxes for displaying collections.
In one of the drawers, I added a scanned/printed copy of an old (early 1900's) post card photo of a gal churning butter, then cut to fit & attached with dots of glue inside the drawer for displaying butter tools.
© copyright 2012 redshedvintage.com 


Thursday, August 8, 2013

Trash Talk Thursday: Hearth Stand from a Chew Stick


Rescued from the roadside, this discarded old coat & hat rack had become a chew toy for a presumably large dog. With the help of some wood filler, I recycled another man’s trash into a sturdy hearth stand for displaying vintage fireplace tools.

 After scraping the loose paint, I used a putty knife to fill the deep chew holes with wood filler, scraping the excess & creating a smooth finish with the flat end of the tool. When the putty was fully dried, I sanded the surface with an electric finishing sander followed by one coat of red semi-gloss interior paint.


Thursday, August 1, 2013

Trash Talk Thursday: A Greater Grater!

Vintage graters really stand out when displayed in front of electric or battery candle light. This newer grater featured a wooden frame with a drawer, perfect for housing a strand of battery operated LED lights for a cheerful kitchen sconce.


Since I won’t be using this for food purposes, I applied a light coat of flat black spray paint to make it look older, then painted the wood with flat interior Red Delicious. When it was dry, I rubbed Old English dark wood scratch cover over the surface, removing the excess with a dry cotton rag.
(Use caution when handling sharp metal graters)
I chose a battery operated set of LED lights from Dollar Tree, but you could also use a single bulb or strand of electric light(s) also available at discount stores.


Thursday, July 25, 2013

Trash Talk Thursday: Framed Display Boards!

Got some old frames? Convert them to display boards!
Recycled old frames make great memo or photo boards ~ here's a cheap and easy way to do it yourself. Whether for use as an ever-changing photo or treasure display, pinning to-do lists or business cards, a jewelry pin collection, or as a special gift for the college student leaving home for the first time ~ any wooden frame will work.
I chose assorted colors and sizes to make a batch of recycled frame boards (painted, distressed, and antiqued with wall paint) but unpainted wooden frames will work just as well.
You'll need a piece of project board (in the school supply section at Dollar Tree)
Scissors
Glue
Burlap (or fabric)
Frame
Using the frame as a template, I cut the project board to fit inside the frame & cut a piece of burlap large enough to wrap around the board. I spread some glue over the board with a sponge applicator (optional, a finger works just as well!) and flattened the burlap with a wallpaper roller (also optional, the palm of your hand works just as well) folding the excess edges over on the back. When the front was dry, I placed the board into the frame, cut the excess burlap off the back, and had cheap & easy bulletin style boards ~ ready for use with thumbtacks or pins!
copyright 2013 www.redshedvintage.com