Showing posts with label Organizer. Show all posts

Monday, January 20, 2014

Putting Up A Faux Front

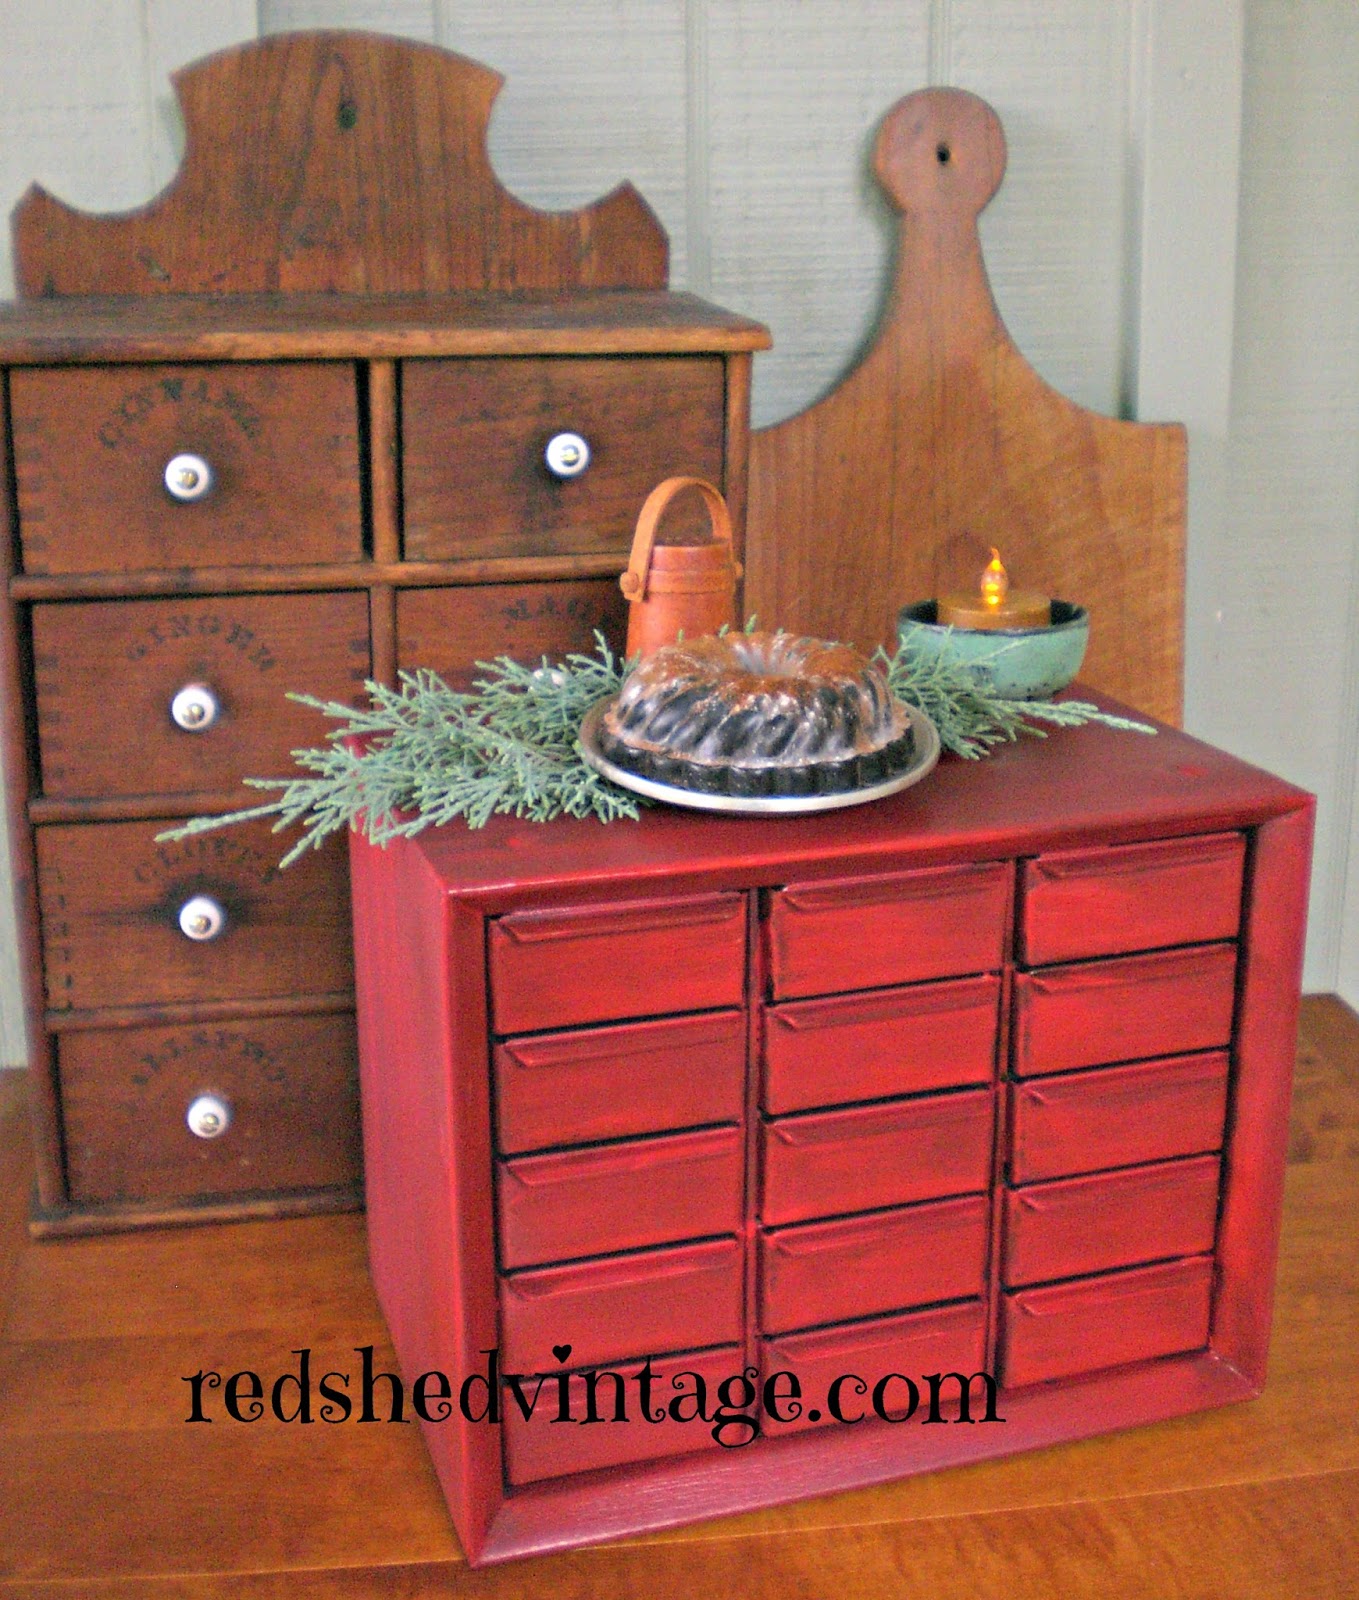
Apothecary cabinets provide lots of little drawers for stashing stuff, but here's another way to utilize the space behind a 'cabinet' ~ go faux! Woodcrafters and unfinished wooden furniture stores often carry faux-front appliance covers of various sizes ~ made to look like an apothecary cabinet in the front but open from the back ~ for placing over toaster ovens or other small countertop appliances.
I picked a used one up @ a thrift shop, and decided to give it a more primitive finish.

First, I removed the fake button drawer pulls. Then I sprayed a light base-coat primer of generic flat Black spray paint across the front & sides. Next, I applied a coat of flat latex To Die For Red (Better Homes & Gardens wall paint, Walmart) and allowed proper drying time before lightly sanding the edges with extra fine sandpaper, for a distressed aged look. Last, I rubbed an even coat of Walnut wood stain across the surface with a clean cotton rag. 
After 24 hours drying time, I  drilled larger knob holes to insert the more realistic looking peg pulls (from the unpainted wood crafts section @ Hobby Lobby) adding a dab of wood glue in each hole before twisting the knobs in.
Faux-front cabinets are also great for hiding bathroom supplies, counter clutter, cookbooks, and of course ~ handy kitchen appliances & gadgets you'd rather not leave hanging out. redshedvintage.com© copyright 2014


Thursday, November 7, 2013

Trash Talk Thursday: Repurposed Pu-Pu Platter Pineapples

Festive 1960's Luau parties called for festive Hawaiian serving platters, so nearly every home ended up with at least 1 wooden monkey pod pineapple. Often sold as pu-pu platter serving sets, pineapple shaped serving pieces included bowls, trays, mugs, tidbit servers, condiment cups.
Since the Pineapple has long been the symbol of hospitality, why not repurpose some vintage pineapple shaped wares during the holidays?
After adding a coat of green acrylic paint to the bottoms of some pineapple bowls, I added a coat of crackle medium to just the body part of the bowl. (I've heard that plain white school glue has the same effect, but I haven't tried that myself.) When dry, I covered the crackle medium with mustard yellow acrylic craft paint, resulting in a more primitive pineapple-like finish with the green peeking through. Brown would also be a great base coat, if you'd rather. When the paint was completely dry, I used a cotton rag to rub a coat of oil-based walnut wood stain over the entire surface. Happy with the upgrade, I ventured on to try the same colors on some pineapple shaped mugs & tidbit trees.
I added some pineapple scented wax shapes in some to give as hostess gifts (made from store-bought wax melts and pineapple chocolate molds ~ rubbed in ground ginger) and tied some of the smaller bowls onto holiday wreaths. These also can be used for organizing or displaying so much more than just serving up pu-pu party finger foods!  © copyright 2013 redshedvintage.com


Thursday, September 12, 2013

Trash Talk Thursday: Spice Box from a Nut House

 
Spice boxes and apothecary cabinets conjure up warm thoughts of colonial hearth cooking. Once used as compartmentalized storage of herbs & spices or apothecary needs and often made of wood or tin with many drawers, these storage units served a valuable purpose and are still very popular today.
They can also be very expensive.
To make-do without making wallet empty, look no further than the garage nut house for a wonderful alternative spice box/apothecary cabinet!
~ Check it out! This makeover of mine was featured in the Winter 2011 issue of A Primitive Place Magazine, page 104 ~
After making sure that the sturdy little house of many drawers won’t be sorely missed, empty & clean the plastic or metal bin drawers in a dishpan of soapy warm water & dry completely, then wipe the cabinet unit with a damp rag. When dry, apply a liberal coat of flat spray paint on the drawer fronts & cabinet. Paint desired color, using interior flat or matte, then when dry rub on stain & sealer to desired antique finish. If extra durability is desired, follow with a protective coat of clear acrylic spray.
Spice names can easily be painted or stamped using acrylic arts and crafts paint. I purchased a tiny set of alphabet letters for $1.00 at Michaels recently, and dipped the ends in black paint to stamp on the finished drawers. © copyright 2011 redshedvintage.com


Thursday, September 5, 2013

Trash Talk Thursday: A Curiously Cheap Spice Box


An inexpensive alternative to vintage spice boxes is to convert a wooden cassette tape rack into a make-do storage cabinet. An overabundance of these outdated cassette cubbies can be found at thrift stores and yard sales for next to nothing. Add some curiously sturdy peppermint tins as drawers, and you’ve got an inexpensive storage box with compartments for spices or teas!
 
I spray painted this cassette rack and some tin Altoids boxes flat black, then painted the sides using red interior house paint. Never one to throw away old drawer knobs, I happened to have some small metal spice box knobs & used a strong magnet on the inside of each box to hold the knob in place on the outside. The cassette slots are also a great size for organizing crafts supplies, especially rubber stamps & ink pads. © copyright 2011 redshedvintage.com
Check it out! This makeover of mine was featured in the Winter 2011 issue of A Primitive Place Magazine, page 105.


Wednesday, May 1, 2013

Trash Talk Thursday: Repurposed Desk Organizers

Humans often feel the need to organize their workspace, sometimes by purchasing even more clutter in their efforts to organize the existing clutter ~ as a trip to most thrift stores will attest to. Desk organizers are also great for stashing stuff in most any other room ~ TV remotes in the living room,  garden supplies in the shed, art supplies, tools, kitchen gadgets, recipes, booklets & pamphlets to name a few.
Here's a cast-off Pottery Barn organizer which I found for $1.99 at the Salvation Army Thrift Store, a bit beat up but constructed very well of solid wood...
After a coat of flat green wall paint with lightly sanded/distressed edges and a cloth-rubbed coat of walnut wood stain, it was ready for displaying some photo props by the back door!  Complete directions for how to paint/distress vintage wares can be found on my youtube tutorial by simply clicking here.
Here are photos of some of my other repurposed desk organizer projects...


Add caption


copyright 2013