Showing posts with label Wooden. Show all posts

Tuesday, November 11, 2014

Recycled Salad Bowl Sets


Vintage wooden salad bowl sets make great holiday gift baskets, and there's no shortage of them at yard sales and thrift shops.
Here's a vintage salad bowl set which I recently cleaned, painted, sanded, and stained ~ ready to use as individual holiday gift baskets. I use them to hold gifts of various themes, such as guest soaps & rolled wash cloths, kitchen spices & spoons, or hot cocoa & tea packets with candies, etc. I use cellophane gift basket bags from Dollar Tree & tie with jute twine for fast and easy gifts.


Did you know you can remove grease & grime from vintage wooden wares with baking soda? (Not for use on valuable antiques, of course!) I mix baking soda
& warm tap water to form a thick paste & rub it over greasy wood surfaces, allowing it to dry. After rubbing the paste off with a dish towel dipped in hot water, I put them in a sunny spot to dry. You might want to test a small area before completely covering your wooden wares in baking soda, sometimes this causes the wood to crack. 


For this particular set, I painted the outsides only ~ using various colors of latex flat interior paint, sanded the edges for an aged look, then rubbed oil-based wood stain with sealer over the entire surface including the natural wood interiors.


 redshedvintage.com© copyright 2014


Monday, January 20, 2014

Putting Up A Faux Front

Apothecary cabinets provide lots of little drawers for stashing stuff, but here's another way to utilize the space behind a 'cabinet' ~ go faux! Woodcrafters and unfinished wooden furniture stores often carry faux-front appliance covers of various sizes ~ made to look like an apothecary cabinet in the front but open from the back ~ for placing over toaster ovens or other small countertop appliances.
I picked a used one up @ a thrift shop, and decided to give it a more primitive finish.

First, I removed the fake button drawer pulls. Then I sprayed a light base-coat primer of generic flat Black spray paint across the front & sides. Next, I applied a coat of flat latex To Die For Red (Better Homes & Gardens wall paint, Walmart) and allowed proper drying time before lightly sanding the edges with extra fine sandpaper, for a distressed aged look. Last, I rubbed an even coat of Walnut wood stain across the surface with a clean cotton rag. 
After 24 hours drying time, I  drilled larger knob holes to insert the more realistic looking peg pulls (from the unpainted wood crafts section @ Hobby Lobby) adding a dab of wood glue in each hole before twisting the knobs in.
Faux-front cabinets are also great for hiding bathroom supplies, counter clutter, cookbooks, and of course ~ handy kitchen appliances & gadgets you'd rather not leave hanging out. redshedvintage.com© copyright 2014


Thursday, October 31, 2013

Autumn Bowl!

 
Serving up salads with flair created a need for artful vessels back in the 1960's ~ 80's. Salad bowl sets in a variety of shapes and themes became a staple in kitchen serving ware, including  wooden bowls in the shape of different fruits to coincide with salad ingredients and/or pu-pu platter spreads. Apples, pears, pineapples, even acorns were popular salad serving themes.
I added even more flair to these thrift-store apple shaped wooden bowls, by painting/sanding/staining them different shades of orange ~ perfect for Autumn décor !  I used the largest bowl for trick~or~treat candies, the smaller bowls for Fall potpourri mix, pumpkin flavored coffee creamers, guest soaps in the bathroom, and displaying pumpkin scented wax shapes. Next week I'll share how I updated some pineapple shaped pu-pu platter bowls! © copyright 2013 redshedvintage.com
~ Have a safe & happy Halloween ~ 


Thursday, September 26, 2013

Trash Talk Thursday: No Fret Firkin Stack

Check it out ~ all of my firkin bucket makeovers pictured below were published in the Spring 2012 issue of A Primitive Place Magazine, pages 82 ~ 85!
© copyright 2012 redshedvintage.com
 
The popularity of vintage mid-century wooden buckets has driven the price out of the ballpark for most collectors, but with a little creative searching and thinking outside the firkin box one can still find affordable methods for growing a stack of these pantry buckets.

Often stacked by graduated sizes, rustic wooden buckets still offer practical storage for seasonal items or household supplies. Most of the wooden buckets circulating nowadays were reproductions of colonial cooper’s buckets, mass produced in the 1950’s – 60’s at the tail end of the colonial revival era. Warehouse décor stores such as Basketville in Putney Vermont were once stocked to the rafters with the inexpensive wooden buckets of various sizes. I've recently put together this big stack of painted firkins for under $50.00, and chances are you can do the same.

Knowing their past uses can be the key to finding affordable vintage buckets through thrift store and online searches. Since many folks have no clue what a firkin is, firkin buckets often go unsold on internet websites or online auctions, or sell for a fraction of what collectors would pay. I’ve found inexpensive firkins online which were listed for sale as popcorn pails, pretzel containers, cheese boxes, planters, magazine racks, Basketville baskets, purses, salt boxes, kitchen canisters, ice cream barrels, piggin’ pails, churns, even beach or toy buckets. The next time you are searching for firkins or buckets to buy online, try entering some different key words and you too might just find some hidden bargains.

Likewise, you can start looking for firkins in all the odd places while browsing through thrift stores and flea market booths. I’ve found firkins mixed in with the vases complete with dusty plastic plants, in the tool department holding greasy nuts & bolts, in the toy department filled with Lego blocks, in the shoe department as a shoe shine kit, in the salt & pepper shakers section, even in the purse department. Below are the makeover stories for most of the wooden buckets pictured in the above stack...
 
A Pretzel Pail
I found this firkin listed as a Handpainted Wood Pretzel Container for just $9.00 (plus $6.00 shipping) on etsy.com. With wooden finger bands and lid intact, this 'pail' was practically a steal.

After sanding the entire surface to remove all paint & varnish, I dusted the bare wood and applied 2 coats of Federal Blue Old Fashioned Milk Paint. When the paint dried, I distressed the finish by hand sanding with fine grit sandpaper, then dusted the paint powder with a dry rag and sprayed a light coat of clear acrylic spray sealer. Milk paint adheres better to unpainted or stripped bare surfaces and can be a bit tricky to work with, but darkens over time to look authentically older than most latex paints.

~~~~~~~~~~~~~~~~~
A Sweet Deal Cookie Jar
 
 
Similar in size to the pretzel container but with metal bands, I found this firkin listed simply as a Vintage Cookie Jar on ebay for only $8.50 including shipping. After lightly sanding off the cookie motif, I used a base coat of flat black, followed by a coat of Moss Green interior flat latex paint. When completely dry, I distressed the paint by sanding with an electric palm sander, then applied Minwax Wood Sheen Rubbing Stain & Finish with a dry rag.

~~~~~~~~~~~~~~~~~~~~~~~~~~~~~
Back On The Wagon Ice Barrel
 
This larger firkin was found towering over a shelf of shot glasses and barware at a church thrift store, which could be a story in itself but with a price tag labeled BAR ICE BARREL $2.00 it quickly became the next trash to treasure makeover story.

Sometimes vintage buckets come with extras such as metal or plastic embellishments, removable legs with brackets on the bottom, even electrical lamp kits added through the center. As a matter of preference, I like to remove all that and fill in any holes left behind with wood filler, which is what I did with the plastic Eagle on this firkin. Don’t let the spare parts deter you from buying a thrift store bargain bucket, they truly are easy to remove with just a common screwdriver.

The metal bands on this bucket were not in the best of shape and I like the more rustic look of wooden finger bands, so I decided to ‘make’ my own. Metal bucket bands can easily be covered with wooden bands from basket repair splints or scrap baskets, Chinese bamboo steamers, or even strips of rubber carpet cove molding. I used a .99 thrift store bamboo sectional steamer for this particular bucket, by soaking 2 of the sections in warm water for 20 minutes. I removed the steamer’s widest strips, towel dried them, then wrapped them around the metal bands while still damp, nailing the strips directly into the bucket with 7/16" copper tacks (available at Home Depot) and overlapped at the tapered ends. The wide splints from old baskets also work great, simply soak the basket in warm water for 10 minutes, cut and remove some splints to wrap& nail or staple around the bucket. The ends can be tapered by cutting with scissors to resemble finger bands. After applying a flat black base coat, I painted this bucket with Mustard Yellow interior semi-gloss latex, then sanded with an electric finishing sander & rubbed watered down brown acrylic craft paint over the surface for an antiqued look.
~~~~~~~~~~~~~~~~~~~~~~~
 
Spicy Stack Topper
 

While browsing through the Salvation Army thrift store one day, I was stunned & amazed to find this set of .59 baby firkins amongst the vintage salt & pepper shakers! Complete with swinging pegged handles and made in USA, I knew these would be the icing on the cake for topping firkin stacks. I discovered they are plentiful on eBay and Etsy, usually listed as salt & pepper or S & P buckets or churns. By simply filling in the shaker holes with wood filler, these tiny 1940’s firkin replicas become unique top of stack buckets. After filling in the spice shaker holes, I painted these little buckets assorted colors and distressed by using a cardboard fingernail file, then sprayed with a light coat of clear acrylic sealer. These also make great ornaments for hanging on a Spring themed tree or wreath.
~~~~~~~~~~~~~~~~~~~~~

Magazine Racks Hold Up The Stack


The largest of firkin buckets often had dividers added inside for use as magazine racks or knitting/sewing project holders. Checking out the books and sewing areas of your favorite thrift stores can result in great firkin finds.

I found this huge firkin filled with hunting magazines in the corner of the book section at the local Hospice thrift store, and almost fainted upon peeking at the $4.00 price tag. The volunteer clerk pointed out that there was a similar magazine rack which had been converted into a sewing box that I might be interested in for $3.00, but since it was half-price day on craft supplies I’d be able to buy it for $1.50. Needless to say, I gladly took both of those off her hands and now make a point to check out books & crafts at all thrift stores.

Neither of these large buckets had their original lids, but don’t the lack of lid deter you from buying bargain buckets. A round wooden plate can take the place of missing lids, and work especially well when stacking buckets. I keep a drawer full of thrift store wooden dishes of assorted sizes on hand, they usually only cost pennies, are easy to store, and come in handy for make-do firkin lids. I painted the larger bucket with Colorplace To Die For Red flat interior paint, and the smaller one White semi-gloss interior. Both painted buckets and make-do wooden plate lids were distressed using a palm sander, then rubbed with watered down brown acrylic craft paint on a rag for an antiqued look.


Thursday, August 8, 2013

Trash Talk Thursday: Hearth Stand from a Chew Stick


Rescued from the roadside, this discarded old coat & hat rack had become a chew toy for a presumably large dog. With the help of some wood filler, I recycled another man’s trash into a sturdy hearth stand for displaying vintage fireplace tools.

 After scraping the loose paint, I used a putty knife to fill the deep chew holes with wood filler, scraping the excess & creating a smooth finish with the flat end of the tool. When the putty was fully dried, I sanded the surface with an electric finishing sander followed by one coat of red semi-gloss interior paint.


Thursday, May 30, 2013

Trash Talk Thursday: Repurposed Planter Dough Box


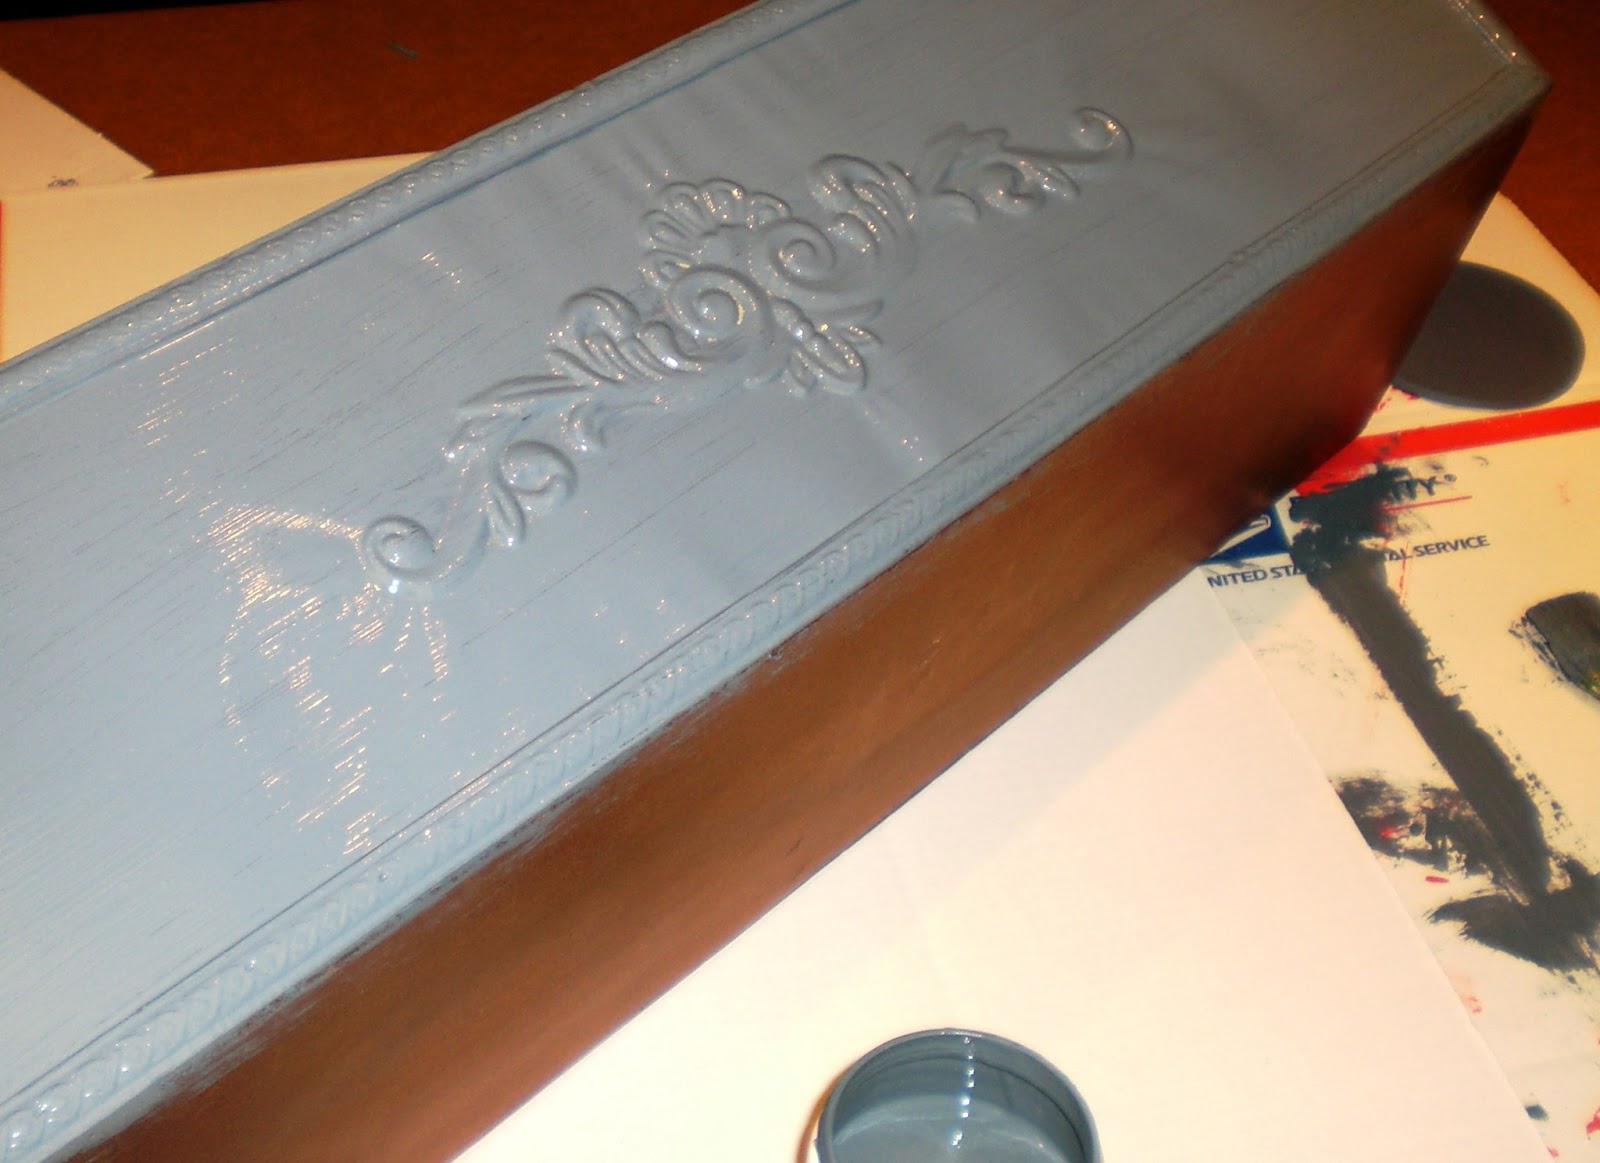
While antique dough boxes are great for displaying wooden bowls, a modern day planter can be a much cheaper alternative for those of us on a tight decorating budget! This newer wooden plant tote box was a $2.00 thrift store find, just the right size for my collection of farmhouse dough bowls.
While the sides of this wooden box were already embellished with embossed metal panels, a carved wooden applique/onlay can be glued to any planter box for an artistic touch, available at most home improvement, hardware, or craft supply stores.


Using a $1.00 can of 'oops' mistinted flat blue wall paint sample from Home Depot, I brush painted 2 coats over the entire surface, allowing 1 hour drying time between coats.


The next day, I very lightly sanded the edges with a piece of fine grit sandpaper to add an aged primitive look, dusting the excess powder with a dry rag. As a final finish, I dipped a clean cotton rag in Ace Hardware's oil-based Walnut wood stain, rubbing an even coat over the entire surface & allowing a couple of days drying time before using.

copyright 2013 www.redshedvintage.com


Wednesday, May 22, 2013

Trash Talk Thursday: Ring of Love Wreath

Wedding season is approaching, so I'll feature some uniquely inexpensive wedding décor and gift ideas in the next few weeks!
(Last week was our big moving day, so I skipped Trash Talk Thursday due to all the extreme activity going on)

I found a couple of large unpainted 1980's wooden heart wreaths at a thrift store last year for $2.00 each ~ what a great score if only for the cost of the chunky wooden hearts! Since it wasn't near Valentines Day at the time, I painted & sold them in my Etsy shop as wedding décor. Each heart wreath was lovingly handcrafted, constructed of layered thick & solid wooden hearts overlapping each other and nailed together to form a ring of love. They measured 21" round x about 2" deep and weighed over 5 lbs. each!
To create your own circle of hearts, simply overlap heart shaped wooden or cardboard cut outs to form a circle (use a round object to make a circle template, if needed) and attach the hearts with glue or nails. I painted mine with red craft paint over black, but you could also paint each heart different colors for a patchwork effect. I also rubbed glossy walnut wood stain sealer over the hearts with a dry cotton rag once the paint had dried, for indoor or outdoor use.
Heart wreaths are great décor for engagement parties, weddings, or year around décor. They can hang on the wall or door, or can be used flat as a table centerpiece or with a floral/candle arrangement. You can also add assorted photos of the bride & groom on each heart for a personalized gift! 
copyright 2013 www.redshedvintage.com


Wednesday, April 24, 2013

Trash Talk Thursday Tutorial: Mending Your Wings + Other Wooden Things

This past week I found a great pair of vintage wooden wings for only $2.00 @ a neighbor's yard sale ~ priced so cheaply because one of the wings had broken off. Not a problem ~ I simply pulled out my first aid kit for wood & reattached my wing! Here's how:
 
First, I reattached the wing with some wood glue, fitting it back together the best I could ~ it wasn't a clean break so some chunks of wood were missing. I let it dry overnight, then used a flat head screwdriver to apply wood filler in the gaps ~ building it up with a few applications until it matched the surrounding areas.
The next day, I sanded the repaired areas with fine grit sandpaper, then decided to go ahead and sand the entire piece to knock some of the polyurethane shine off.
Next, I applied Old English Scratch Cover over the repaired area with an old paintbrush, allowing it to soak in for about 1/2 hour, then wiped it off with a cotton rag.
Since I had sanded the entire surface on this piece, I added a final step of hand-rubbed stain, but normally I would stop here after the scratch cover application. I resealed the sanded wood surface by painting on & rubbing off an even coat of natural wood stain & sealer with a clean cotton cloth, and allowed a couple of days drying time.
Note: If you wanted to paint a repaired wooden piece, you'd just skip the scratch cover & stain, and paint right after sanding the repaired area.

I'm pretty happy with the way it came out! I think it'll look great hanging over our antique plane propeller on the fireplace ~ will post a photo once we've settled in @ our new place. 
copyright 2013