Showing posts with label Chest. Show all posts

Friday, May 16, 2014

Sew~So To Star~Spangled Apothecary


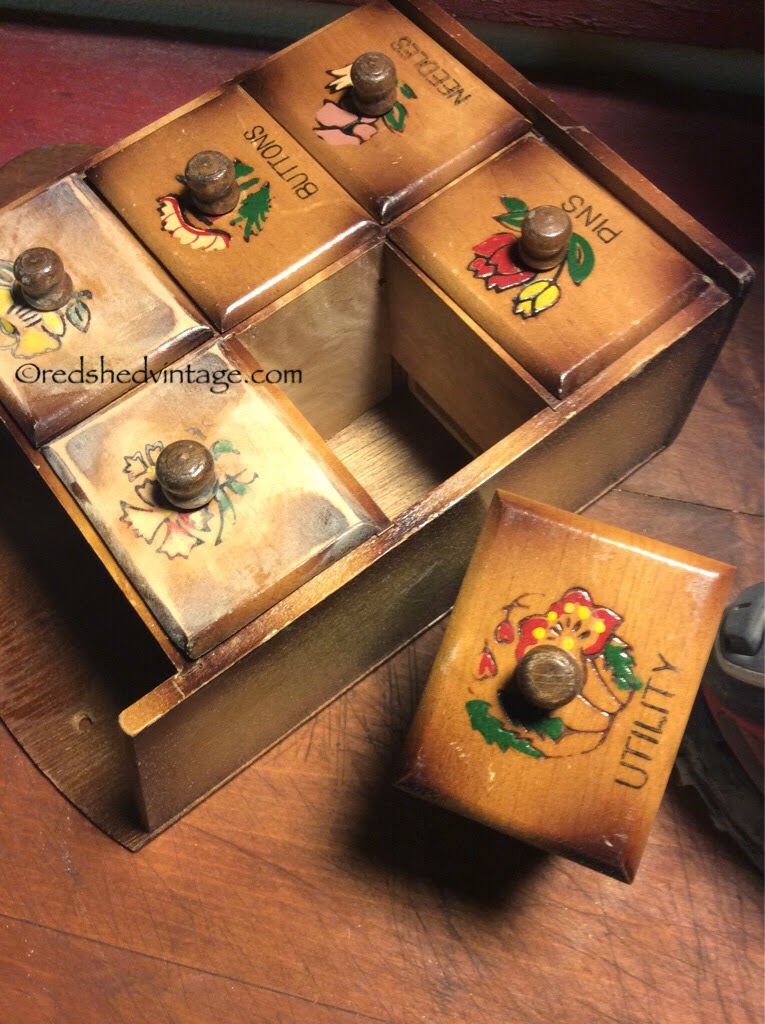
After several years of painting/distressing/antiquing vintage finds for others, it's nice to have some time to recycle some junque finds for myself lately! This week I scored this cute little sewing notions apothecary at a local thrift shop.

After removing the notions & motifs adorning the drawers with fine grit sandpaper, I applied a thin even basecoat of Vintage color Americana Décor Chalky Finish paint (available at Home Depot and Michael's).
Then I mixed equal parts Cobalt & Admiral Blue acrylic craft paint (.50 cents per bottle, Walmart) for a second coat, followed by a final dry-brush coat of Admiral to darken the color up a bit.
The next day, I used fine grit sandpaper to distress & age just around the edges, followed by wiping a light even coat of oil-based wood stain (Walnut) over the painted surface with a dry cotton rag, allowing a couple of days drying time.


I'm going to use the updated little cabinet to stash the patriotic & military odds & ends I've picked up through the years. 
Have a great week!
~Donna at Red Shed Vintage 

redshedvintage.com© copyright 2014 

Tuesday, March 12, 2013

Trash Talk Tuesdays: Radio Cabinet Redeux


I’d been searching for a shelf to house the assortment of little storage drawers I’d accumulated, when I spotted this grand old radio cabinet in a neighbor’s trash! The 1920’s era radio guts had been stripped, making it even better. Radios were often housed in elaborate wooden cabinets, to fit in as part of the living room furnishings where families would gather to listen to their favorite show or music.
Some of the veneer was missing & the top had been damaged, so I peeled the rest of the veneer off the top and used some wood putty to fill in the
jagged edges ~ lightly sanding to round the corners once the putty dried. 
After applying 2 coats of flat Red Delicious interior wall paint inside and out, I opted not to distress the paint but lightly rubbed walnut wood stain over the exterior with a cotton rag, concentrating on darkening the grooved decorative designs.
When dry, I was able to use the existing shelving to stack some drawers between, and added make-do shelves with scrap wood planks & attached basic metal shelf brackets w/screws. 

I covered the speaker & knob holes with burlap, and added ball bearing wheel casters to the feet for easy rolling, and now have a hallway apothecary chest to organize craft supplies! I later added the DIY pie safe doors I invented, as posted for last week's Trash Talk Tuesdays Tutorial: Pie Safes Rule.
copyright 2013 www.redshedvintage.com


Scraped the loose veneer off, then filled in the rough spots with wood putty.
2 coats of Red Delicious flat wall paint, followed by rag-rubbed coat of walnut wood stain


Later added homemade pie safe doors on the back